How to Shoot Food

Our editors visited a workshop run by Alexander Slyadnyev, well-known food photographer born in Odessa. The workshop was organized by the Canon Master Club. If you used to shoot your meals for Instagram to entertain your grandma or girl friend you will find tips and trick we are offering to you very useful and you will get more “Likes” and nice weight. Ready! Steady! Go!

1. Get Right Equipment
The lens is the key, any photographer says so.
Alexander used to use only Canon (otherwise the event would go with another brand patronage, of course). But by his opinion a camera is third as important while lenses are the first to choose.
To make nice pictures of food you can use telephoto lenses. That’s over 90 mm. Alexander Slyadnyev owns three lenses (and probably will recommend you to get them as well). The first one is 90 mm Canon Tilt Shift. This lens has a tilt angle, so you can adjust the sharpness in the frame. The second is Canon EF 100 mm f/2.8 L IS USM Macro to catch sushi and small things. And the third lens is 135 mm. It is the most beloved lens by the photographer as it makes ideal pictures. For the beginners Alexander recommends to a 100 mm lens, and then, perhaps, 135 mm; Tilt Shift may be not that handy to many photographers.
To say about cameras, Alexander owns three. SLR camera Canon 5D Mark is absolutely great but along with a lens it can weight 2 kg. Mirrorless Canon EOS M3 is a compact and lightweight and has two extra benefiting features: you can use any professional lens with a special converter, and you can send pictures made over to your smartphone via WiFi (and then to Instagram, for instance). The third camera is, of course, iPhone and it is really handy if you know how to use it for taking pictures. But you need some add-on lenses to make nice shots of food. There is no problem to find a purchase that kind of add-ons but lenses should be “tele” anyway.
VSCO Cam is an excellent software for post production of pictures taken by a smartphone.

If you think a smartphone for making food masterpieces is enough, try to improve your photos with this application. It is free but you can buy paid content as well.
2. Recommended Settings: Aperture 8, ISO 100 or 200, and Better Use a Flash Light
In most cases Alexander takes pictures at aperture 8 to secure enough sharpness for snapshots. Or aperture 5.6 sometimes. He does not recommend to take photos under natural light if you need to shoot more than one dish. The case is he light can change dramatically. Flash light is worth if you come to the job seriously. In the case you set ISO 100 or 200. Well, if you forgot your flash light at home, set the ISO to 400 and go ahead for the sun light.
3. Background Forms the Picture
That is why you have to select background very carefully (well, if waitress or your grandma are not in opposite). Mirroring surface, nice plate, old wood, and some other “ancient” stuff any photographer need to carry with him and look for at flea markets or store in expensive restaurants – all these will really help a beginning photographer who wishes to make good food photos. No right background that makes the picture atmosphere right, express the moment, discover how the food was made, underlines homeliness or high status of the place, and there will be no right picture.


4. The Light should be Soft to Make the Dish Look Attractive
The food should look natural. So the direct sun light does not fit. To make sun light form your window softer cover it with a white parchment. Alexander takes 90% of his pictures having only a single light source.
5. The Light Should be Placed Behind the Dish
And as close as possible. And the source should be as wide as you can make.
The dish, camera, light source and reflector are better to place as shown on the picture.

By the way, our photographer ensures he doesn’t have a professional reflector. For the purpose he uses a waiter or a curious visitor (so a restaurant is a better place as your grandma would swear a lot and kick you out of the table) with a white A3 paper sheet. For very special occasion it may be a foil or a salmon package. Well and a waiter is a very good replacement for your tripod as you cannot carry it all the time.
6. It is Better To Shoot Food at the Angle We Used to See It.
For an adult it is about 45 degrees and sometimes from above. For a children is is a view from a side. We as human beings love our habits, so food on a picture taken from unusual angle will not be that attractive.
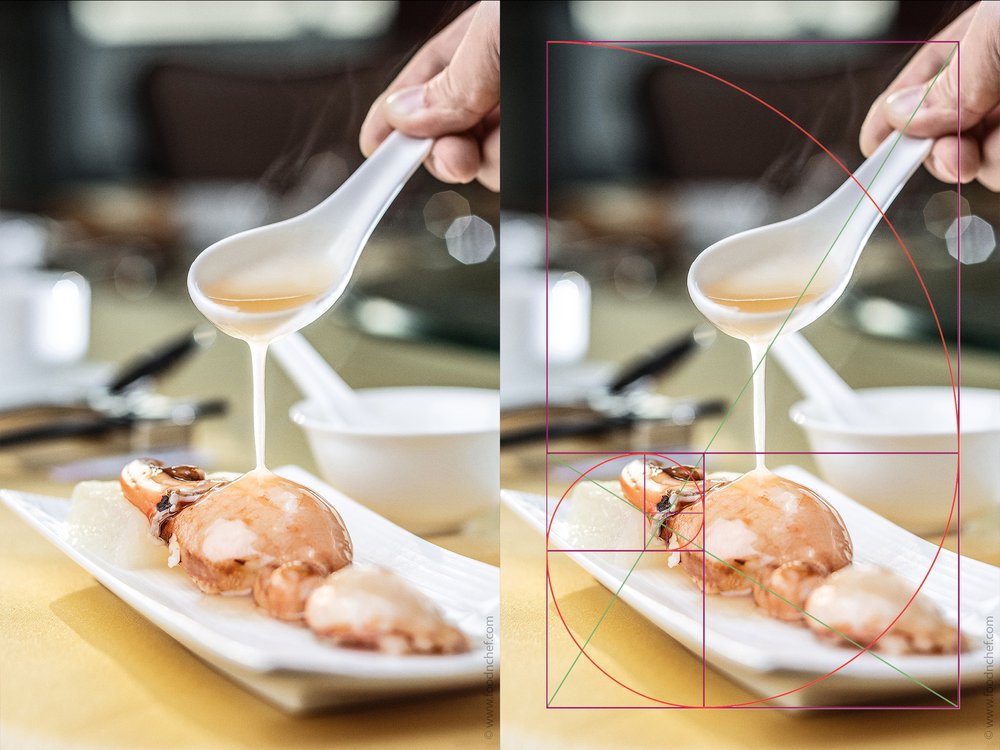
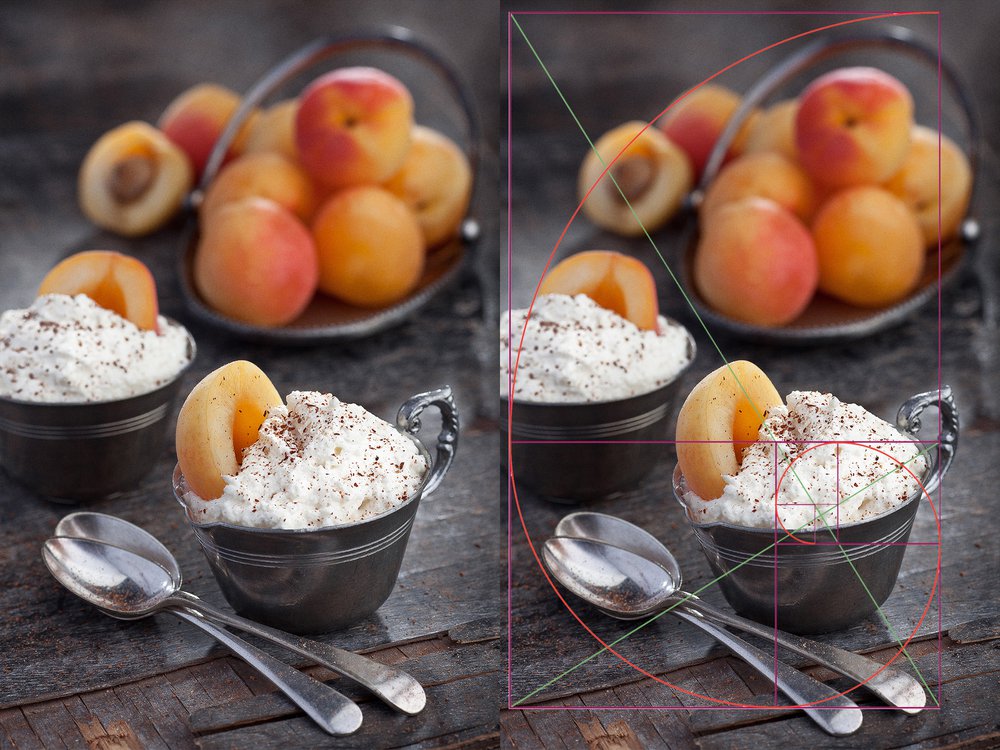
7. Compose the Scene Using the Golden Ratio

Composition is the king. As well as lens, background, angles.
There is the Golden Ratio rule stating that a picture should be divided into three parts: 2/8, 3/8 and 3/8. They are imaginary lines to carry meaning horizons. Cross points are the meaning points for the picture. Tip #1: if dish parts do not fit to the golden ratio just move them right way. But if the chef is famous food idol with Michelin stars you will get a scandal and another kick out of the restaurant. Tip #2: cameras used to have a mode displaying the lines, so use the mode until you have enough experience.
The rules of diagonals states that to take a right picture of food you have to place the dish diagonally.
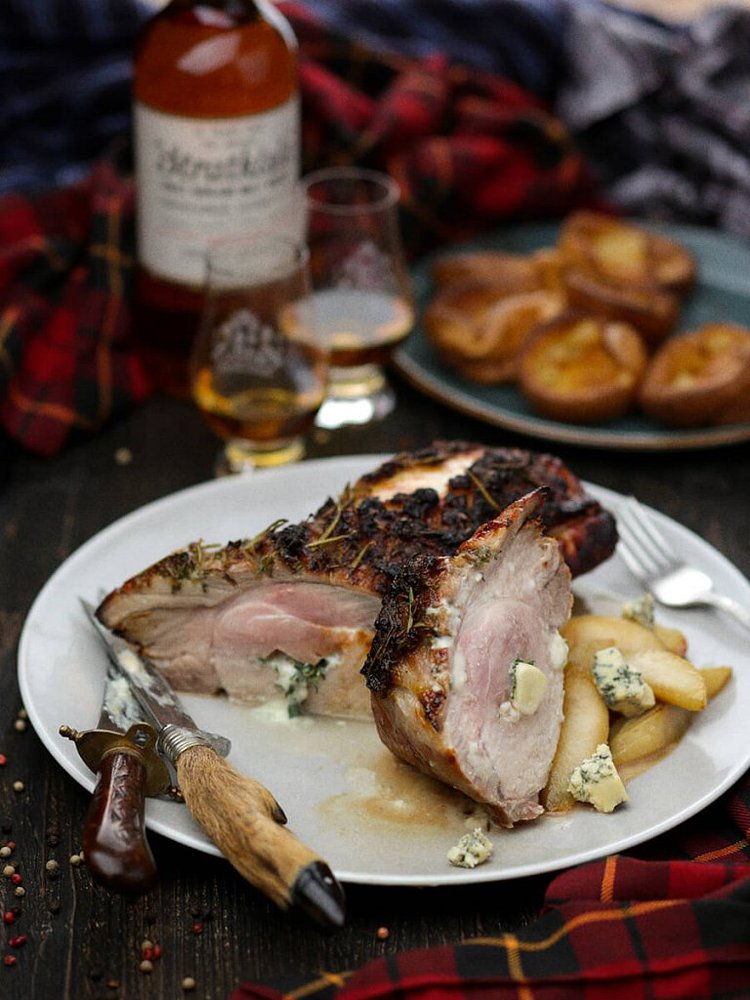
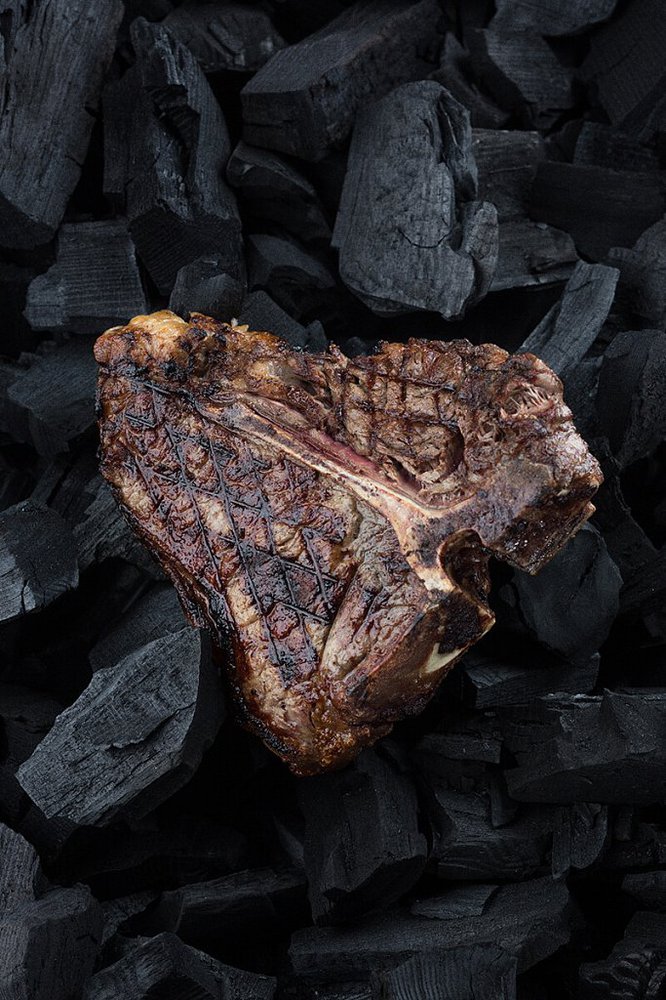
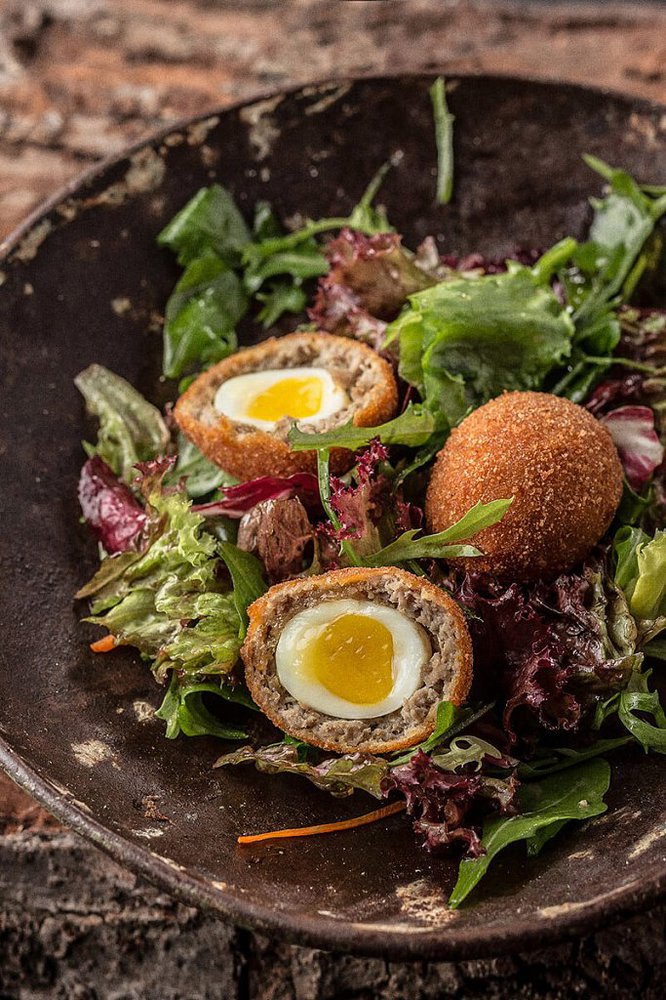
Some beautiful pictures to demonstrate it all.

8. The number of items in your picture should follow the numbers of Fibonacci.

The Fibonacci Sequence is the series of numbers. The next number is found by adding up the two numbers before it: 0, 1, 1, 2, 3, 5, 8, 13, 21, 34, etc. Alexander believes the number of similar objects in the picture should be equal to one of the number of the sequence to show nicely for human eyes. You can start with any number, either 1 or 5, etc.
9. Tell a Story in Every Picture
Actually the picture you make should give spectators additional value, additional information. For instance, the picture here is an ad of the Whisky Fan Club and all the composition tells you what drink is advertised (right glass and right approach; with ice or Coke you would kill the picture) and for who (the man is in an expensive and well fitting suite) and where (the man wears a slightly unbuttoned shirt, is in relaxed posture, he is tired after his long working day and can relax a bit in the pleasant company of the great drink).

10. Send your pictures to social networks after 6 p.m. as Alexander does
If you arm yourself with all tips and tricks we offered here and you are still here, not kicked out of the restaurant (or from you grandma’s country house), you probably have a talent and the restaurant is happy you’re filming their dishes. Of cruse you have to immediately share your great pictures to social networks. Ideally, post your pictures after 6 p.m. as your food pictures will look more attractive to those hungry and dieted people, so more people will feel emotions looking at your pictures. Thus you have all chances to become a new scandal star and bring more traffic to the restaurant.
P.S. And do not forget if you’re going to be a professional food photographer, be ready to travel and eat a lot.
A big and heavy bag with dozens of kilograms of equipment (power generator, tripod, a couple of lenses, your favorite background, a camera or two, and many many more things you will need during your trip), weeks and months in trains and planes will not take off extra weight of your own. That will be your fate.