Ajax security system review
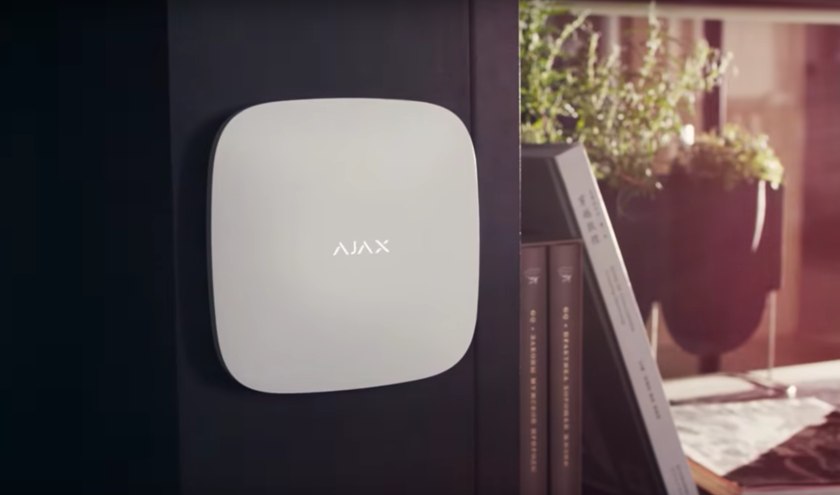
All listed in this review for the first look can be seems like something weird because before on gg was not published any reviews of security systems. I'm sure that during reading your imagination will show you pictures with big boxes among plenty of wires and other similar staff that probably associates in your mind with the security system. But all this not about a new generation of the security systems from Ajax. I'm sure you will be surprised like I was when faced with this great product. So let's getting started.
Table of Contents
- Brief introduction
- Torture of choice
- Ajax StarterKit
- Detectors not included in StarterKit
- Ajax Hub and detectors management
- First switching on and setting up Ajax Hub and detectors
- Operating experience
- Exterior view of devices
- Connecting Ajax to the CMS
- What comes next?
- The bottom line
- My personal impression
- Gratitude
Brief introduction
The thing is that this review will not be full if I don’t tell you about the problem in the solving of which I found Ajax StarterKit. Thus, the case began when the apartment where I was living with my wife, was flooded just before our vacation. It was an unpleasant situation but, I have to admit, we got off cheaply and had minimum damaged property. Of course, not taking into account our wrecked nerves and spoiled mood.
After coming back home, we were surprised to find that our neighbors upstairs had been robbed. These circumstances induced us to find some solution that would protect our home from similar situations in the future. The task was also complicated by the fact that we had a rental apartment and our landlord would not want to install a security system at his expense. If we had to pay for installing a security system out of our pocket, we would like to take this system with us when moving to another apartment. Besides, we would like to have a security system that would also minimize damage from flood or fire, in addition to the antitheft alarm function. Certainly, the entire system needs to be connected to the control of the State Guard Service (SGS).
After a conversation with SGS specialists and security system sellers, I came to a conclusion that there was no universal solution. There is a separate burglar alarm that will notify about illegal entry into the apartment; there is a separate solution that will block water supply in case of a pipe break; there is a set that can notify about a fire. However, there is no security system that would combine all this functionality. Yet, I was wrong.
AJAX Wireless Security Kit
Hub kit. Kit consists of: 1 central unit Hub, 1 detector MotionProtect, 1 magnetic contact for doors and windows doorprotect, 1 remote control spacecontrol
Check price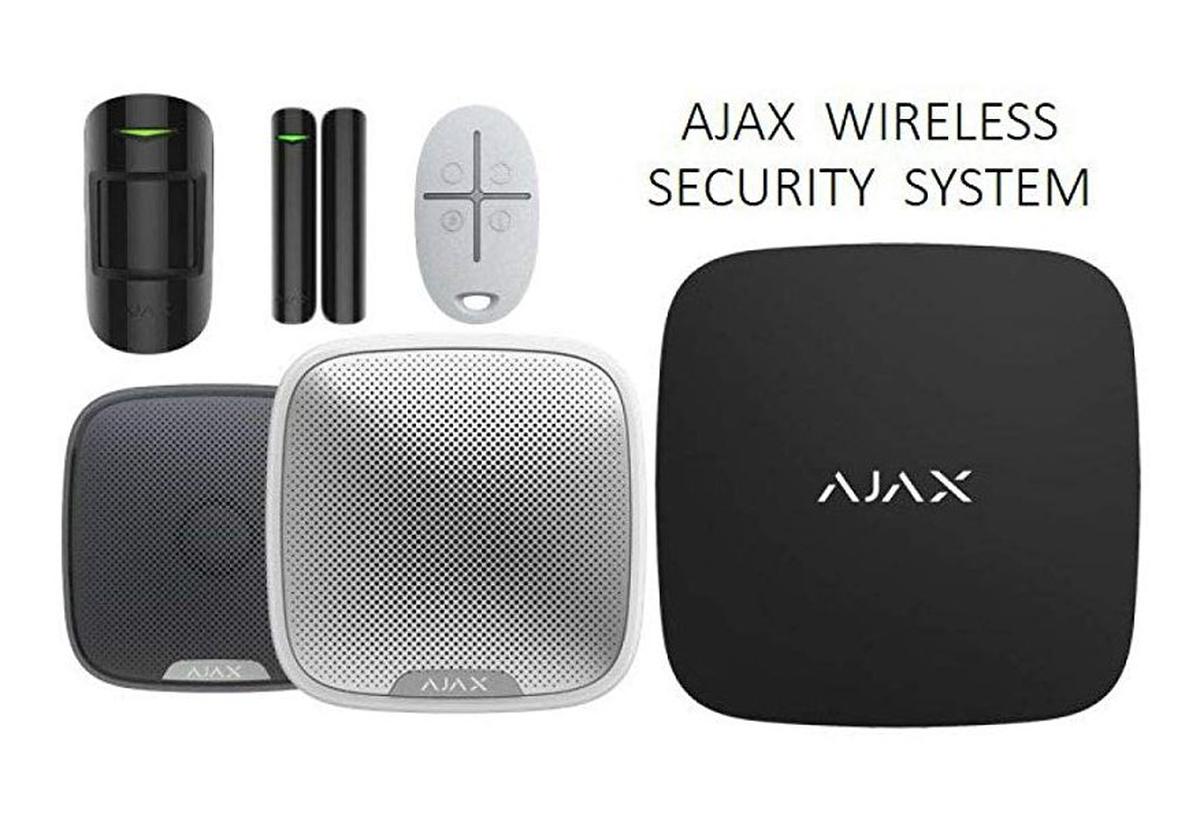
Torture of choice
I think before I will start to tell you my story will be opportune to tell you couple words about Ajax Systems company. Ajax Systems was founded in 2011 as a non-startup company and specialized in developing and manufacturing security systems, wireless detectors of movement and wireless window and door opening sensors. It’s a pretty young player on the market of the security systems, but I decide to trust this company to guard my home because only this vendor on Ukrainian market at this moment offers a system that meets all our requirements.
While looking for a solution to meet our demands, I came across Ajax StarterKit. As there was not much information on the Internet about this security system at the time of the decision, I had to talk to a SGS engineer by telephone to find out whether Ajax Systems could be installed on their control, and also I talked to a manager of secur.ua shop, where I was planning to buy Ajax StarterKit.
As a result of the conversation with the SGS engineer, I understood that they couldn’t offer a system that would grant the demands mentioned above. Ajax Systems mains are not installed on the control yet, and, according to the engineer, the process of negotiations about the beginning of installation “is not quite smooth.” I was upset a little, even though the ordinary engineer, who is in charge of consulting clients, can hardly be named an ultimate authority.
After that, there were several calls in different e-shops, asking about Ajax StarterKit resources. I heard the most exhaustive answers from the manager of secur.ua e-shop. Essentially, after this conversation I made a decision about the purchase. Six hours after the order was placed, I had my Ajax StarterKit.
Ajax StarterKit
I think, before I will start to tell you my story will be opportunely to tell you couple words about Ajax Systems company. Ajax Systems was founded in 2012 as non-startup company and specialized on developing and manufacturing security systems, wireless detectors of movement and wireless window and door opening sensors. It’s a pretty young player on the market of the security systems, but I decide to trust this company to guard my home because only this vendor on Ukrainian market can offer a system that meet all our requerements.
At the beginning, I wanted to buy a black Ajax Starter Kit. Then, after thinking a little, I came to a decision that black is not a very practical color in this case, because the walls and wallpaper in the apartment were white. In the end, I decided that all the detectors and Ajax Hub would be white but it would be better to have black SpaceControl, which is also a part of the set. Yet, the secur.ua manager made me upset by saying that Ajax StarterKit was sold as a single unit and there was no possibility of changing something in the set with a similar device of a different color.
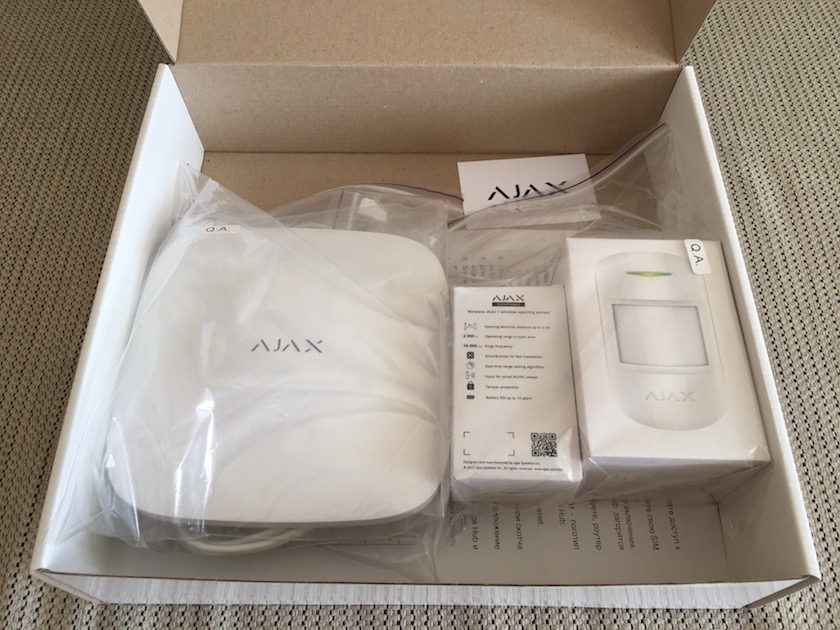 Opened box with Ajax StarterKit
My Ajax StarterKit was packed in a white carton without polygraphy. The label with QA inscription was on one butt end on the box. The contents of the box were as follows: Ajax Hub, Ajax DoorProtect, Ajax MotionProtect, Ajax SpaceControl, power cable for the hub with a Europe-type plug on one end and C7 connector on the other, 1m length 5e category patch cord for connecting the hub with router and switch, a Kyivstar mobile operator SIM-card with a local tariff plan, Ajax Systems business card and an A4 leaflet memo. All Ajax StarterKit sets are completed with SIM-cards, which are intended for selling in Ukraine.
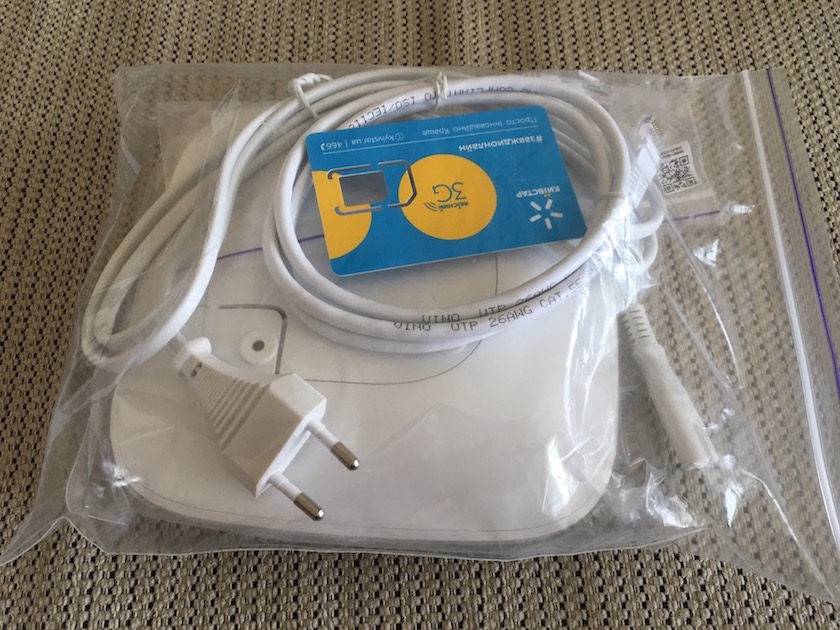 Ajax Hub after I took it out of the box
The Ajax Hub itself was packed in an ordinary plastic bag with a plastic fastener and consisted of a power cable, installation kit, and a SIM-card.
 Ajax DoorProtect, Ajax MotionProtect and Ajax SpaceControl
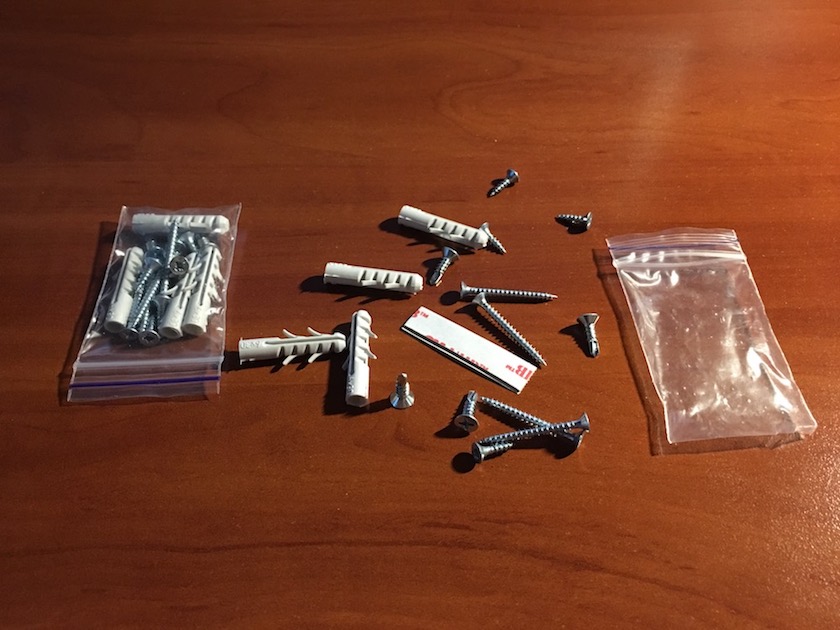 Example of the installation kit
DoorProtect, MotionProtect, and SpaceControl were in smaller boxes with polygraphy. There was a device, an installation kit and a manual in English in each box. It is worth telling more about the installation kit. It is a small plastic bag with four screws, four plastic dowels for them and four strips of 3M assembly double-sided sticky tape inside. I attached all with the help of assembly sticky tape at my place, but we will come back to this later.
 The box for Ajax Hub
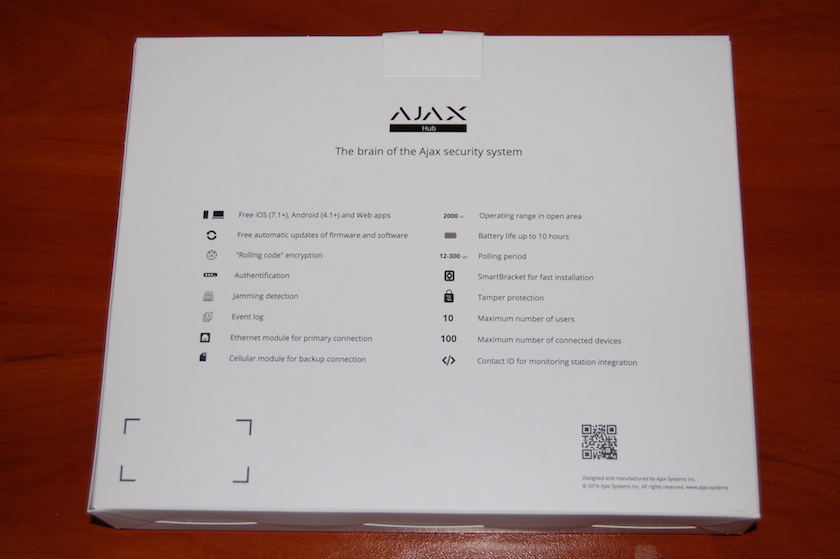 The box for Ajax Hub (back view)
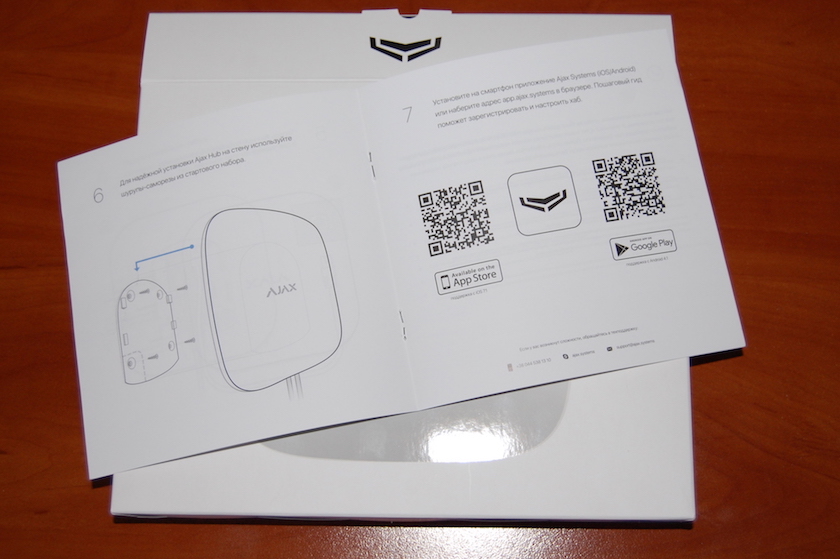 Compendium (manual) for Ajax Hub
As it turned out, I received a set from the previous deliveries, and now Ajax Hub is sold in a beautiful carton box with polygraphy. And now, I will tell you about the main, detectors and key fob, which are parts of Ajax StarterKit.
Ajax Hub main
This is the brain of the Ajax security system. From the outside, it looks like a wireless router: the body is square-shaped with chamfered edges. There is a luminous Ajax logo on the front side, which also notifies about the Ajax Hub connection status with Ajax Systems infrastructure (we will talk about this later): red - the connection is absent, green - there is a connection only by one channel (Ethernet or GSM), white - both channels are used for connection. In the rear part, there is a concealed C8 connector for connecting the power cable from the set, 8P8C connector, commonly called RJ45, for connecting the Ethernet cable and a slot for SIM-card. All these are closed with a SmartBracket cover, which has openings for fixing the hub on the wall. The cover itself is equipped with a tamper, based inside the hub, which encloses contact in closed position. This system quite safely protects the main from unsanctioned opening.
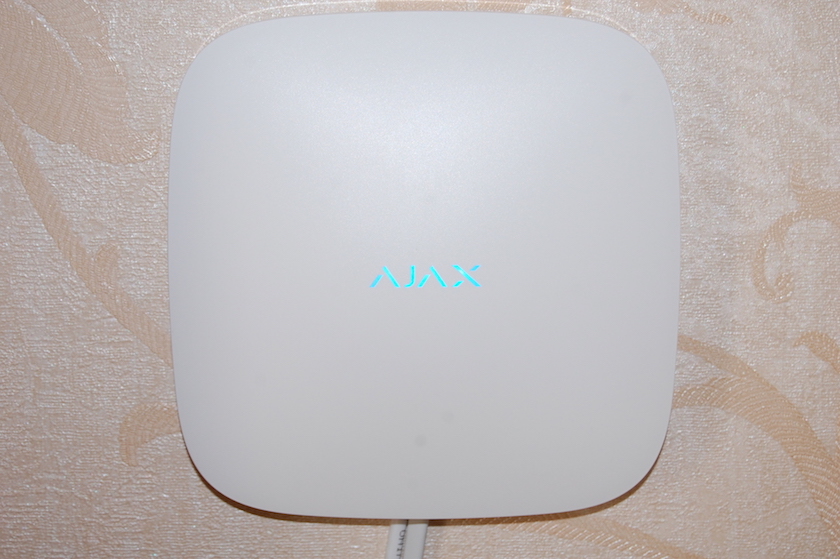 This is how Ajax Hub looks when attached to the wall
The quality of the materials is excellent: the cover is perfectly fitted to the connector in the body and there is no gap in closed position. Closing of the SmartBracket fastening is accompanied with an audible click and tactile sensations, which allows understanding without mistakes that you put it in the right position, signified by the developers as “the cover is closed”. The light-emitting diodes of the logo don’t protrude beyond the body. The plastic of the body is thick and impervious to light. The main creates an impression of a monolithic, high-quality manufactured object.
For connection with detectors, Ajax Hub uses a Jeweller company protocol. This is a hardware complex which involves encoding, synchronization and algorithm of power control for power optimization.
When creating a new generation main, a right decision was made not to use wires in Ajax Systems. As designed by engineers, the system (and I fully agree with them here) has to be durable and simple to install. Since the existing wireless protocols had a lot of weak sides, Ajax Systems needed to create their own from the beginning. Some of Jeweller features:
- Data which the devices and the hub are exchanging, are packed in encrypted packages. These few bites of information are transferred during milliseconds;
- Data packages are encrypted with the help of their own jCrypt algorithm with a floating key, which was also developed from scratch;
- The hub always knows with which device it is exchanging the information even at the conditions of strong radio interference. If a disparity occurs or in the case of bad connection, the hub starts the process of detector authentication for second synchronization with the system;
- Each device knows its place and time of entering the ether and pings the hub with an interval from 12 seconds;
- Connection radio channel is protected with the help of multilevel filtration. If the hub detects any questionable signal, the process of deep examination will be started. If only one disparity is found, the system will stop reacting to the signals of the suspicious source;
- The hub is able to switch between frequencies to prevent damping. Moreover, it determines detectors which were influenced by the source of countermeasures.
The frequency range in which the main maintains radio communication with devices is from 868 to 868.6 Hz. The maximum radius of interaction with Ajax devices is up to 2 km on conditions of the line of sight. For connection with each device, the main uses its own frequency. The maximum power of the emitted radio signal is 25 mW. Up to 100 devices can be connected to the system. This is enough for safe protection of a private house of any size.
Moreover, the main is equipped with a reserve accumulating Li-lon 2Ah battery, which provides autonomous work for up to 10 hours in the event of power failure. Administration of the system and changing settings are made through the application for iOS/Android and web-application – you can find the link for them on the Ajax Systems website. Switching the main in the security mode can be additionally made with the help of the SpaceControl key fob, which is part of StarterKit.
Ajax Hub works under the control of a real time operating system (RTOS). Ajax Systems don’t uncover details of architecture and origin of RTOS. It was only mentioned that it is fork RTOS with opened source code, which was deeply customized and, at the moment, it is a fully closed decision. Certain facts were listed in favor of choosing closed real time operational system:
- Safety. The majority of vulnerabilities in the Internet arises when using open source systems/prepared decisions.
- Hardware is cheaper. Demands for the RTOS productivity for Ajax Hub are much lower than those for Linux, for example;
- The speed of event reactions. RTOS in Ajax Hub have to provide task processing in a very short time interval – no more than 10 mks;
- Minimum power consumption. Ajax Systems constantly works in this direction because it allows extending the operating time from a standby battery;
- Minimum start time. Ajax Hub has to be ready for work a few seconds after switching it on.
When I was writing this review, the latest firmware version was 1.27.001 (now it’s 1.28.001). I bought Ajax Hub with 1.26.000 firmware. The difference between these two versions is in adding the HomeSiren support and improved operation of FireProtect, LeaksProtect and WallSwitch.
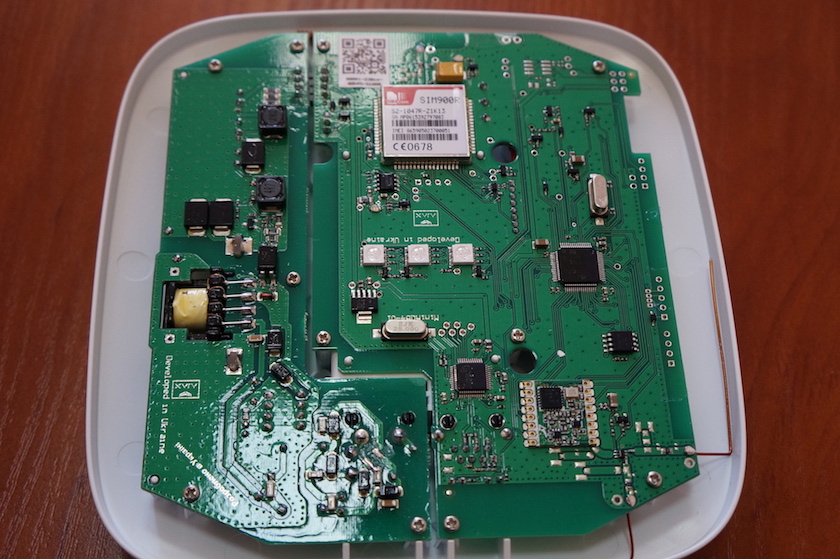 Ajax Hub without cover
By the way, here is a housekeeping tip. Ajax Hub with hardware revision 6.0.1 (or 601 depending on how it is represented in your application) uses GSM-module SIM 900. Unfortunately, this module does not have any 3G support, so even if you have SIM-card with 3G access, you will not be able to use high-speed data transfer. Your hub will only work with the 2G network, using GPRS. The same concerns hubs with hardware revision 7.0.1 with the SIM 800 GSM-module. It also has only the 2G support, but with slightly faster GPRS (multi-slot class 12/10 versus multi-slot class 10/8 in SIM 900). This constructive feature is due to the fact that the hub has to interact with the mobile operator network even if the quality of coverage is poor (normal work will be provided even when the GPRS speed is 0.5 Kbit/sec), so 3G support is excessive.
MotionProtect motion detector
The designated purpose of the detector is to detect the motion in the apartment. After opening the box with MotionProtect, you will find the detector itself, the installation kit and the instruction. The detector is made of thick polished white plastic. There is a lens in the central part of the front panel. There is a light-emitting diode in the upper part, which will be glowing in the case of the motion detection in the security mode, or it will also serve to indicate the radio contact quality with the main when testing the signal level. The engraved Ajax Systems logo is located in the bottom part. MotionProtect is equipped with SmartBracket fastening for mounting it on the wall. This can make mounting easier, because the detector does not need to be disassembled to be mounted on the wall. Moreover, there is a tamper on SmartBracket, which protects MotionProtect from unauthorized opening in the same way as in the hub.
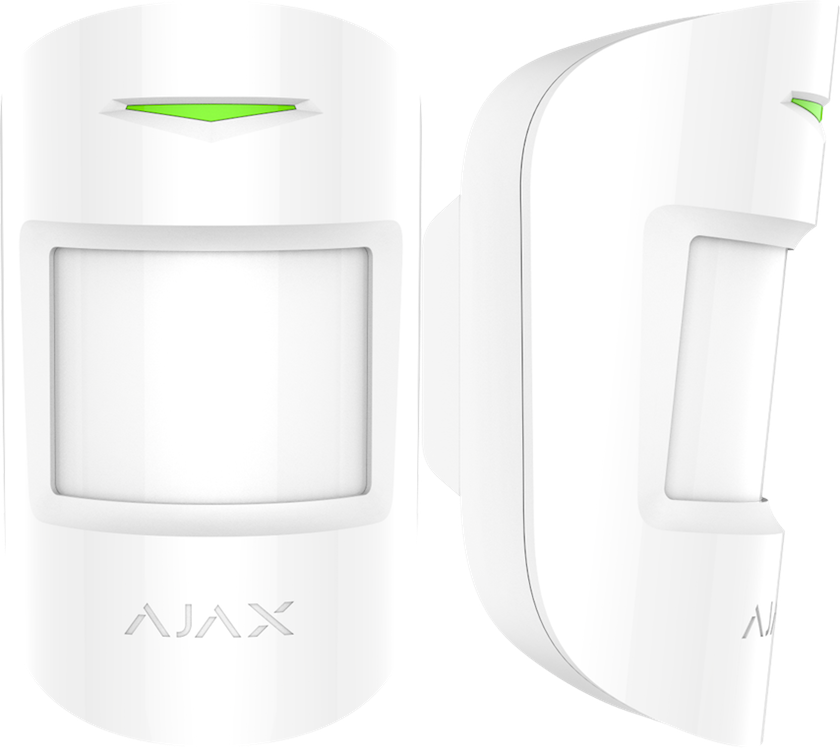 Ajax MotionProtect
The detector is able to detect motion at a distance of up to 12 meters. An infrared sensor of the Excelitas Technologies production is used for motion detection. It is located behind the white lens, produced by Fresnel Technologies. The lens itself is made of a POLY IR4 material. This material represents special plastic, which provides minimum loss when infrared beaming with the wave length of 8 through 14 µm is passing through it. This type of infrared beaming is called Long-wavelength infrared (or LWIR in the abbreviated form). This range of the so called “temperature image”, in which the sensor is able to receive clear image of objects (including human body), whose temperature is a little bit higher than the temperature of the apartment in which they are situated. In this range of infrared beaming the objects image is formed only due to temperature emission and does not need additional lighting by the sun, moon or infrared beaming. Direct prohibition about installing Ajax Systems “in the direction of the window, to prevent the sun beams from falling on sensor lens, and opposite the objects with rapidly changing temperature (electric and gas heater, etc.)” are connected exactly with these features of infrared beaming with the wave length from 8 to 14 µm. At the same time, the software which controls the detector is “smart” enough to ignore animals weighing up to 20 kg and having a height of up to 50 cm. The angle of the lens view is 88.5° across and 80° vertically.
The detector registers the “temperature image” change, but the closer the ambient temperature to the human body temperature, the smaller is the contrast of the “image”. The temperature compensation algorithm (setting detector sensitivity), which provides optimal sensitivity setting that does not allow the burglar to go unnoticed, was developed by Ajax Systems particularly for these purposes.
MotionProtect uses its own algorithm of motion detection from the first step – FirstStepDetection. It is based on the fact that the processor of the detector traces signal on the RIP-sensor outlet in the real time mode (Passive Infrared sensor) and it reacts to the output signal changes, filtering false operations.
The detector has three levels of sensitivity. High level – few undesired signals, the detector will not react to any objects smaller than a hamster. Medium level – low background noise, the detector will not react to any objects such as a small dog or cat. Low level – significant background noise, the detector will not react to any objects the size of the average dog weighing up to 20 kg. Closing the subject of how the detector detects motion in the apartment, it is worth noting that detector firmware contains 16 Kb of the code, which analyzes the “temperature image” changing. This is a great deal for this type of devices.
MotionProtect radio contact with the main is made by Jeweller protocol, the maximum power of the radiated signal is 20 mW. The maximum distance at which the detector is able to maintain connection with Ajax Hub is 2 km on the conditions of line of sight.
When the security system is in a “security” mode, the detector sends an alarm signal if the motion has been detected, but no more than once in 5 seconds, synchronously switching on the light-emitting diode. When the security system is in the passive mode “inactivity”, the detector reacts to motion no more than once in 3 minutes without switching on the light-emitting diode. In the detector settings, one can switch off the motion detection mode if the main is not in the security mode. This will save the battery. According to the manufacturer, the service period of the power element is 7 years. It is remarkable that the MotionProtect work can be provided by the CR123A battery and it can be replaced without assistance in case of any failure. It is necessary to unscrew three screws and take off the back cover.
DoorProtect door/window opening detector
The name of this detector speaks for itself. The main function of DoorProtect is to notify about unauthorized opening of the doors and windows. The detector itself is made of smooth white plastic. There are no chinks or gaps on the body, and nothing creaks. The manufacturing quality is excellent. DoorProtect consists of three parts: active block with all electronics and two magnets – a big one and a smaller one. The big magnet is similar in shape to the active block. The small magnet is half as long as the main one and thinner by approximately one third. There is a green light-emitting diode at the upper part of the active block, at the bottom – stamped Ajax Systems logo. All three elements have SmartBracket fastening panels for mounting on the wall. SmartBracket can be fastened using assembly double-sided sticky tape or screws. There is also a tamper on the SmartBracket fastening panel of the active block.
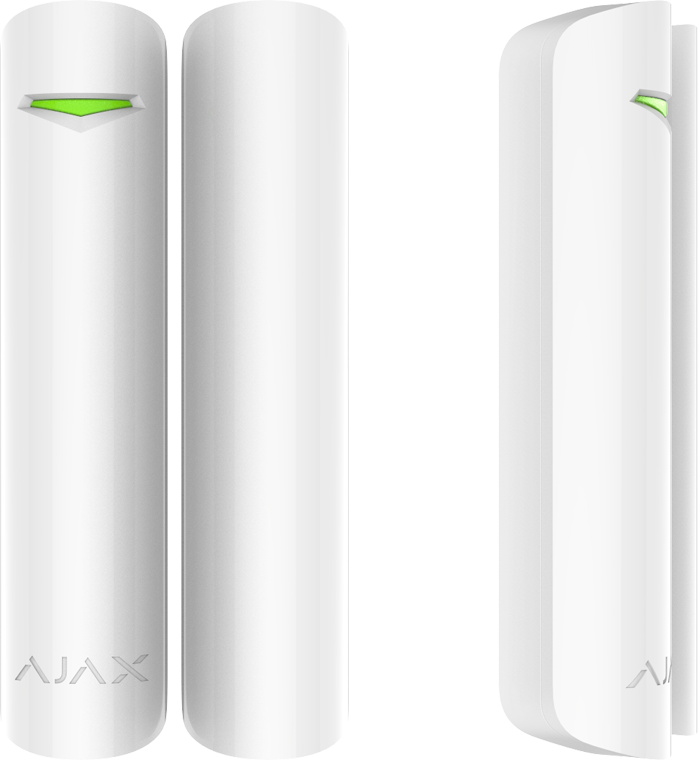 Ajax DoorProtect
The main element which reacts to the door position change is a red switch. It is RI-01CSMD manufactured by Comus. This is why there are two magnets in the set. The minimum distance of the magnet shift in relation to the detector for sending the alarm to the main is 2 cm when using a big magnet and 1 cm when using DoorProtect with a smaller magnet. The operating principle is simple. The red switch itself is normally open-loop type. When the door is closed, the magnet effect becomes weaker, the chain disjoins and the alarm signal is sent to Ajax Hub. Moreover, there is a connector on the back panel of detector’s main block, which is used for connecting an additional hard-wire detector. However, the longer the cable of remote detector, the higher is the possibility of its accidental damage and the worse is the quality of connection. This is why the remote detector Ajax Systems is recommended to be installed at a distance of no more than 1m from the wireless DoorProtect detector.
The DoorProtect radio connection with Ajax Hub is realized through the Jeweller protocol, the maximum power of the radiated signal is 20 mW. The maximum distance at which the detector is able to maintain connection with the main is 2 km on conditions of the line of sight.
In the box with DoorProtect you will find: the detector itself; two magnets; installation kit; cable for additional hard-wire detector connection with the active block; instruction. According to the manufacturer, the DoorProtect is able to work for up to 7 years from a CR123A battery. In the event of full battery discharge, it can be changed by hooking the catch on the back side of the detector and taking off the top cover.
SpaceControl key fob
SpaceControl looks like a key fob from car alarm system. It is made of white or black plastic pleasant to the touch. There are no chinks in the body in the places where the parts are joined together, the key fob doesn’t creak in hands. In a word, it creates an impression of high-quality monolithic object. This is a device for controlling Ajax Hub. With its help, the security system can be switched to security, partial security and you can send an alarm signal to a security control panel. If your Ajax Hub is not connected to the control panel, then pressing this button will provoke HomeSiren and StreetSiren operating (if they are connected) and it will send an alarm signal to mobile devices of the users, which control or use Ajax Hub, coupled with SpaceControl. This is the end of the list with functions of this device.
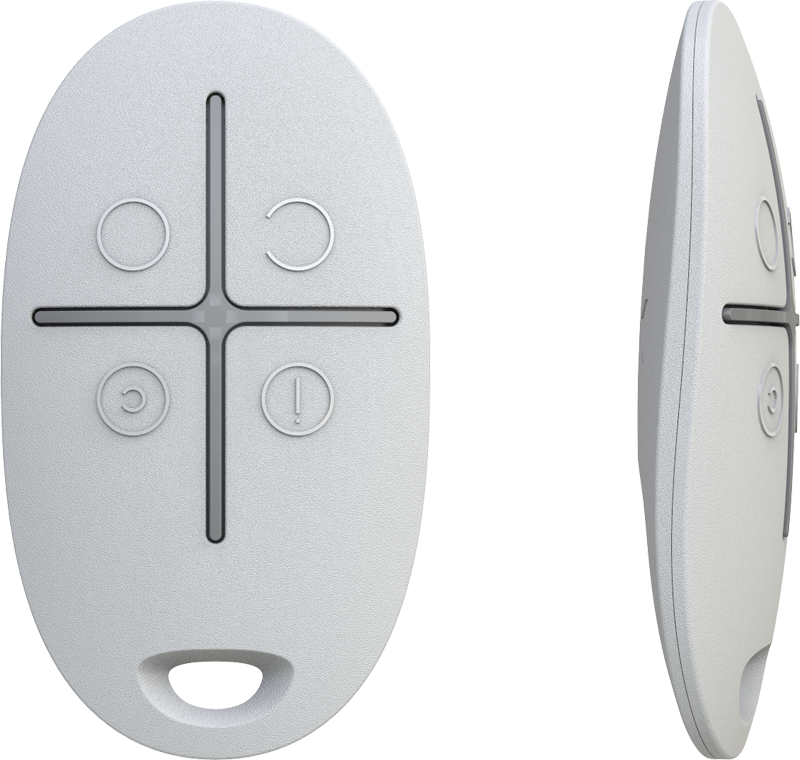 Ajax SpaceControl
Space Control radio communication with the main is realized using the Jeweller protocols, and the maximum power of the radiated signal is 20 mW. The maximum radius within which the device can maintain connection with Ajax Hub is 1 km on conditions of line of sight. The quality and range of the key fob connection with the receiving device in the apartment can change depending on the walls, obstacles, coverings existing between them, and also the thickness of their materials. While passing through the obstacles, the signal loses part of its power. For example, the connection distance between key fob and receiving device, which are divided by two ferroconcrete main walls, is approximately 30 m. The company states that SpaceControl is able to work from the СR2032 power element for up to 5 years.
Detectors not included in StarterKit
It so happened that after our troubles, I decided to buy some more detectors that would make it possible to register motion in other rooms of the apartment, any events of glass break, leakage existence (oh yes, we will remember that flood for a long time) and inflammation. Based on our demands, the choice was made in favor of the following detectors: CombiProtect combined detector of motion and glass break, LeaksProtect detector of early flood detection and FireProtect smoke detector with an additional temperature sensor. I bought CombiProtect, and two LeaksProtect detectors and one FireProtect were kindly given for Ajax Systems review. A few words about these devices.
CombiProtect combined detector of motion and glass break
The detector’s name expressively talks about its functionality. Ajax CombiProtect is designed for motion and glass break registration in the apartment. The choice in favor of CombiProtect was made from the viewpoint of cost effectiveness. I was planning to mount the detectors in the rooms with windows (or with balcony). Personally, I didn’t see any sense in buying MotionProtect and GlassProtect separately. Structurally and on the surface, it was practically the same as MotionProtect, except for the existence of a hole for microphone under the motion detector lens.
 Ajax CombiProtect
CombiProtect detects the existence of motion in the same way as MotionProtect, that is why I will only tell you about how the detector determines the fact of glass break. The electrical microphone is used as a sensitive element. The detector is able to reveal glass break at a distance of up to 9 meters. After switching the main to the security mode, CombiProtect microphone continuously analyzes frequencies of upper and lower range, uncovering typical sounds of glass break. Briefly, the principle is as follows: hitting the glass provokes oscillations in the lower range of frequencies, glass debris produce sounds in the upper range of frequencies. Lower frequencies are heard in order to exclude false operations. The frequency range analyzed by Ajax Systems detector is not uncovered.
The radio connection between the detector and the main is realized through a Jeweller protocol, and the maximum power of the radiated signal is 20 mW. The maximum distance at which CombiProtect is able to maintain connection is 2 km on conditions of line of sight. According to the manufacturer, the service life from the power element is 7 years. By analogy with MotionProtect, CombiProtect source of supply is CR123A type element and it can be replaced in the same way as in MotionProtect.
LeaksProtect detector of flood early detection
Perhaps, this is the most miniature Ajax detector that I have seen. This small box has a 6 cm side and 1.4 cm depth. There is an Ajax logo on the upper side, which is also a LED-indicator that notifies about the type of influence on the detector. The detector body is made of white or black dull plastic. Unfortunately, the upper cover is thin, so when the light-emitting diode snaps into action, an aureole occurs because of translucence of plastic, whose thickness is a few tenths of a millimeter (according to the information provided by Ajax System, it shouldn’t be like this; only the samples that were sent to partners or given for review have this defect). It is especially noticeable in a dark apartment. The class of detector protectability is IP65. It tells that the body is dust-proof and has protection from water stream from any direction.
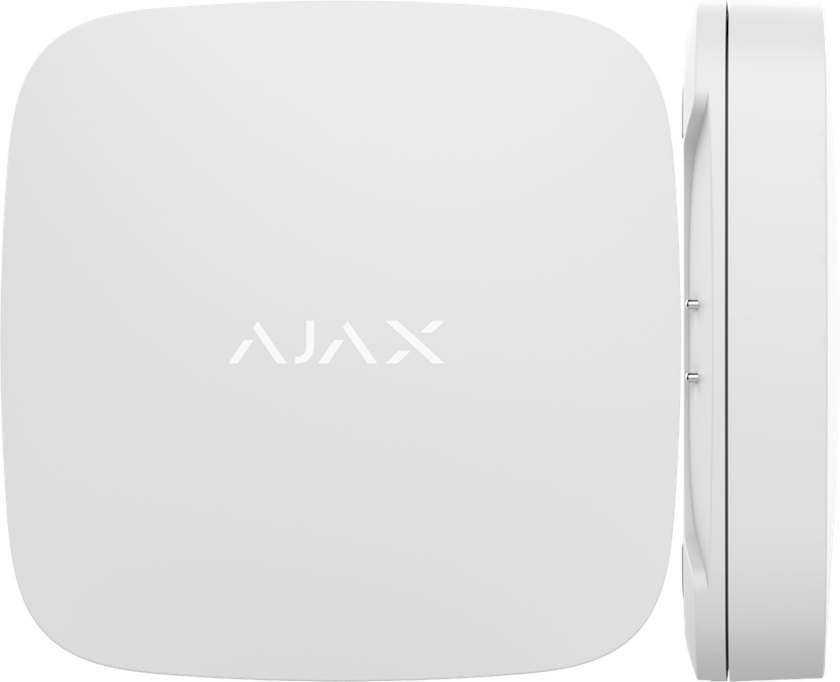 Ajax LeaksProtect
LeaksProtect is not rigidly fixed at the installation location, so you will not find SmartBracket fastening in the set. Instead, it is placed on the floor in places of possible leakage: under the washing stand in the bathroom, near the toilet, under the bathtub, washing machine, etc. Due to such location, LeaksProtect is equipped with a cover which is attached to the body with the help of four screws. There is a tamper on the cover, which, while in closed position, presses the tamper button, located inside the body. Such mechanism allows protecting the detector from unauthorized opening. When trying to open the detector or when the cover isn’t closed tightly, the detector will send an alarm signal to the main, and also the detector will turn on the green light-emitting diode for 1 s.
Flood detection is provided by using four groups of contacts, located at the bottom of the body on each side. If water falls on the contacts, a quick resistance drop occurs between them and the detector sends an alarm signal to Ajax Hub. If there is water (or any other conducting liquid) on at least one pair of contacts, it is enough to activate the alarm. When detecting water, the detector turns on the red light-emitting diode for 1 s. The message about flood will be present in the detector information until the liquid has dried out or has been wiped.
Because LeaksProtect is just put on the floor and not fixed rigidly, it can be accidentally kicked or displaced. This can lead to a lower quality of sending and receiving the signal or even to complete disappearance of the connection between the detector and the main. In order to notify the Ajax Hub administrator about moving in a timely manner, LeaksProtect is equipped with a motion sensor. The integrated sensor will snap into action at any attempt to move the detector, and a message about the detector displacement is sent to the main and the light-emitting diode on its body lights up in green for 1 s. Unfortunately, in firmwares with which LeaksProtect will be available on sale, the above function will be turned off. It is due to the fact that the displacement algorithm is not perfect and its work can cause a large message flow. As a result, if the user uses SMS notifications, it can cause charge-off of a large amount of money from the account which is tied to the SIM-card in the hub. This function in LeaksProtect will be returned later, but it will probably be a different version of the hardware revision. The detector is always in active status and it is able to register flood and to notify about it, even when the main is not in the security mode.
LeaksProtect radio connection with Ajax Hub is provided by a Jeweller protocol, and the maximum power of the radiated signal is 20 mW. The maximum distance at which the detector is able to maintain connection with the main is 1 km on conditions of line of sight. The detector is able to work 5 years using 2 integrated AAA type batteries. To replace them, it is enough to unscrew the four screws on the cover of the device. You will find nothing else but the instruction in the box with LeaksProtect.
FireProtect smoke detector with additional temperature sensor
While LeaksProtect is the smallest Ajax detector, FireProtect is undoubtedly the biggest one. FireProtect is designed for detecting fire, which is followed by smoke emission, sudden increase of temperature without smoke and fire. All the above are symptoms of fire at an early stage. The detector is able to work both independently and as a part of the Ajax security system.
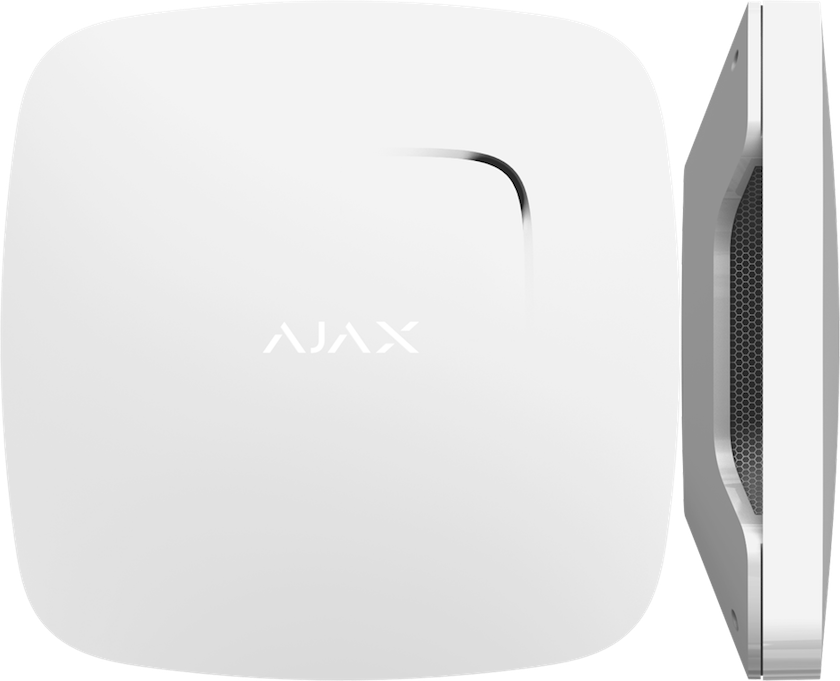 Ajax FireProtect
The body of the detector is white or black and is made of dull plastic. The lengths of the body sides is 13.2 cm, and the depth is 3.1 cm. It is attached to the ceiling with its upper side. The SmartBracket fastening panel with two holes for screws and tamper is located on the top part. A light-emitting diode shaped as Ajax Systems logo is located at the bottom. It is able to notify about the type of detected event using light indication. The logo is also a Test detector button. The smoke chamber grates are located on each side of the detector body.
The detector detects smoke using optoisolator made of the infrared oscillator and photodetector, which are mounted in a special smoke chamber. When smoke particles fall into the chamber, the photodetector detects their existence through distortion of the infrared beam. If there are more smoke particles than some permissible concentration allows, than the distortion of the infrared beam grows and the detector sends a signal about fire alarm on the main simultaneously turning on integrated sound siren and red light-emitting diode. Because some materials burn without smoke emission, an additional fire detection system using temperature measurement is integrated into FireProtect. If the temperature exceeds 60°С, the detector will immediately turn on the alarm signal. FireProtect will snap into action when detecting a quick increase of temperature, even if it is below 60°С. The loudness of the integrated sound siren is 85 decibel. If you are close to the detector at the time when it snaps into action, the produced siren signal can cause rather unpleasant sensations. It is impossible not to notice the siren going off in an apartment or a small house.
FireProtect radio connection with the main is realized through a Jeweller protocol, and the maximum power of the emitted signal is 20 mW. The maximum distance at which the detector is able to maintain connection with Ajax Hub is 2 km on conditions of line of sight. FireProtect is equipped with a set of main CR2 type batteries; using the batteries, it can work for up to 4 years in an autonomous mode. Besides, a CR2032 type standby battery is installed in FireProtect. This battery is necessary to notify about the power element running down and to continue work until the main batteries set is replaced. The main and standby batteries can be replaced without assistance if needed. There is FireProtect, instruction and installation kit in the box along with the detector.
Ajax Hub and detectors management
If you have read the text written in the previous sections of the review, then maybe you will have quite a logical question: how to manage all this equipment, and, what is more important, what devices should be used? This is a good question and, it definitely deserves the answer. Well, Ajax Hub management and changing its settings can be done by using an iOS/Android application and a cross-platform application, which works in browser. To use these applications, it is necessary to create an account in Ajax Security Systems and a login. During the registration, you will have to indicate your email address and phone number. The registration codes will be sent to them, which codes you will have to enter in series. In the future, email address will be used as your login when logging in the applications, and notifications/messages from Ajax Hub about detectors’ snap into action, switching on/off the security mode, etc., will be sent to the specified phone number.
Application for iOS
To install the application, you will have to have iPhone or iPod Touch with iOS 7.1 or higher. I used the application on iPhone 6s Plus at first with iOS 9, and later with iOS 10. To my disappointment, I have to say that currently the application doesn’t support 3D Touch in any form, and it makes me sad. Ajax Systems promises 3D Touch support no sooner than at the beginning of 2017.
 The Ajax application for iOS doesn’t support 3D Touch for the time being
After entering your login and password in the application, you will be redirected to the Devices tab on the desktop. If you don’t have any add-on devices, than at first you will see an offer to connect the hub. If the Ajax Hub is connected, you will see it and the list of connected devices. You can obtain access to additional settings of the device and its detailed status by clicking on each device or hub. There is a notification area in the left bottom part of the screen.
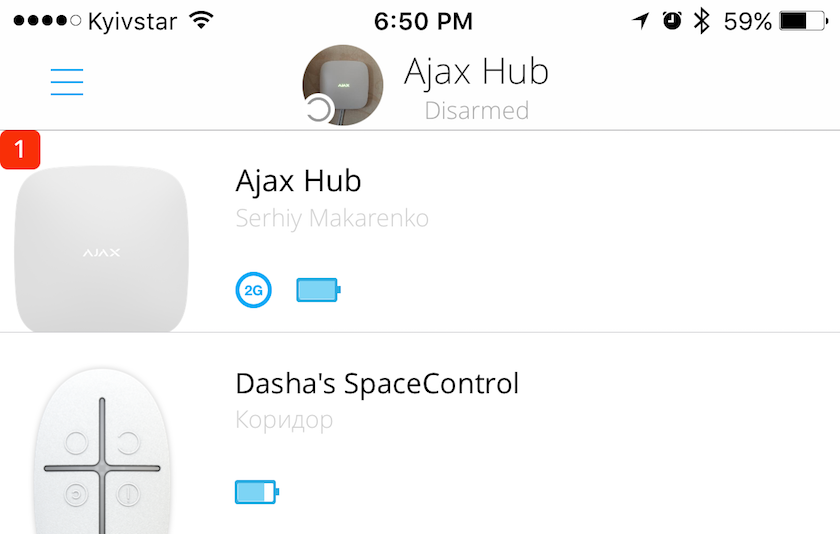 Badge with events, which requires attention of administrator
If the device is affected by a critical event or something that requires attention of the administrator, the red badge with the indicated quantity of the occurred problems will appear in this corner. The following features are displayed to the right of the device image: the battery status; the name of the device, which is given by the user during registration; the room at which the device is registered; the indicator of connection quality. In the case of the hub, the indicator shows the type of connection to the cellular network (2G only), and in the case of the detector – the quality of the connection to Ajax Hub.
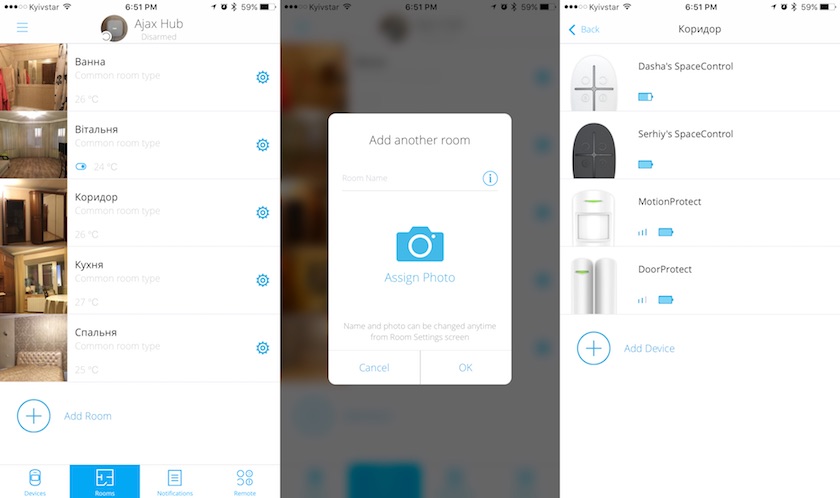 Example of the screen with rooms
And now a few words about the Rooms tab. Ajax Systems uses this essence for assigning the devices by logic groups. There are four types of rooms in the application:
- Standard. This is a usual room in which one can determine a delay for entry and exit.
- Enter. A room in which a delay can be determined only for entry.
- Exit. A room in which a delay can be determined only for exit.
- 24ч. A room which is always under guard, regardless of the hub status. If this type is determined for the room, all assigned devices will work in the “security” mode 24/7.
Moreover, you can assign an image to the room. The following properties are indicated against each room: name, type, temperature, which is read from the integrated temperature sensor, gear button for changing room settings. The following properties are foreseen for each room: choice of the room type, installing a delay for entry, exit and option of partial security. When switching on this option, it will tell Ajax Hub that the partial security mode needs to be switched on for this room after pressing a proper button on SpaceControl.
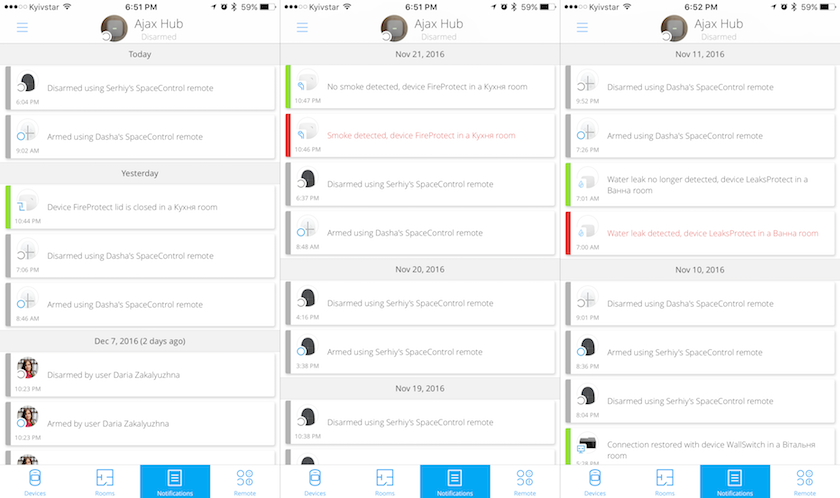 This is how the window with notifications look like
The Notifications tab is designed for review of the notification history about events which were stated by the detectors or hub. Ajax Hub is able to keep up to 500 messages in log.
- The example of the screen with virtual key fob
The SpaceControl virtual key fob is the fourth tab. Unlike the physical one, its interaction with the hub is not direct but is realized through the Ajax Systems infrastructure. The advantage of this type of communication is that you can control your hub from any place where you have Internet connection. Disadvantages are also obvious. If, for some reason, there is no Internet connection on your iPhone, you will not be able to switch on or off the Ajax Hub security mode, even if you are in an adjacent room. However, SpaceControl in-app twin has an advantage which its physical analog doesn’t have. After clicking the alarm button in the application, the alarm signal in the place with the GPS coordinates of your smartphone will be sent to the applications of the users registered at your Ajax Hub.
Ajax Hub settings
By clicking the Ajax Hub icon on the Device tab, you will be redirected to the screen with more detailed information about the hub status. More detailed information about items that need more detailed explanation, is presented below.
 Detailed information about hub status
- Connection status. It displays the connection status of the hub. The ‘online’ status is displayed if at least one channel of connection (GSM or Ethernet) is active and connection with the Ajax Systems infrastructure is established.
- Medium noise (dBm). Because the hub is equipped with two antennas for connection with the detectors, the noise level for each of them will be displayed here. The bigger the number, the worse. The noise level on the screenshot is -97 dBm for each antenna and it is good. It indicates that the connection with the detectors is realized in the minimally noisy environment. With an increase in the noise level above -40 dBm, the hub will notify you about this (in most cases, noise increasing up to this level is the evidence of a jamming attempt).
If someone clicks on the gear button in the top right-hand corner, we will be redirected to the hub settings menu.
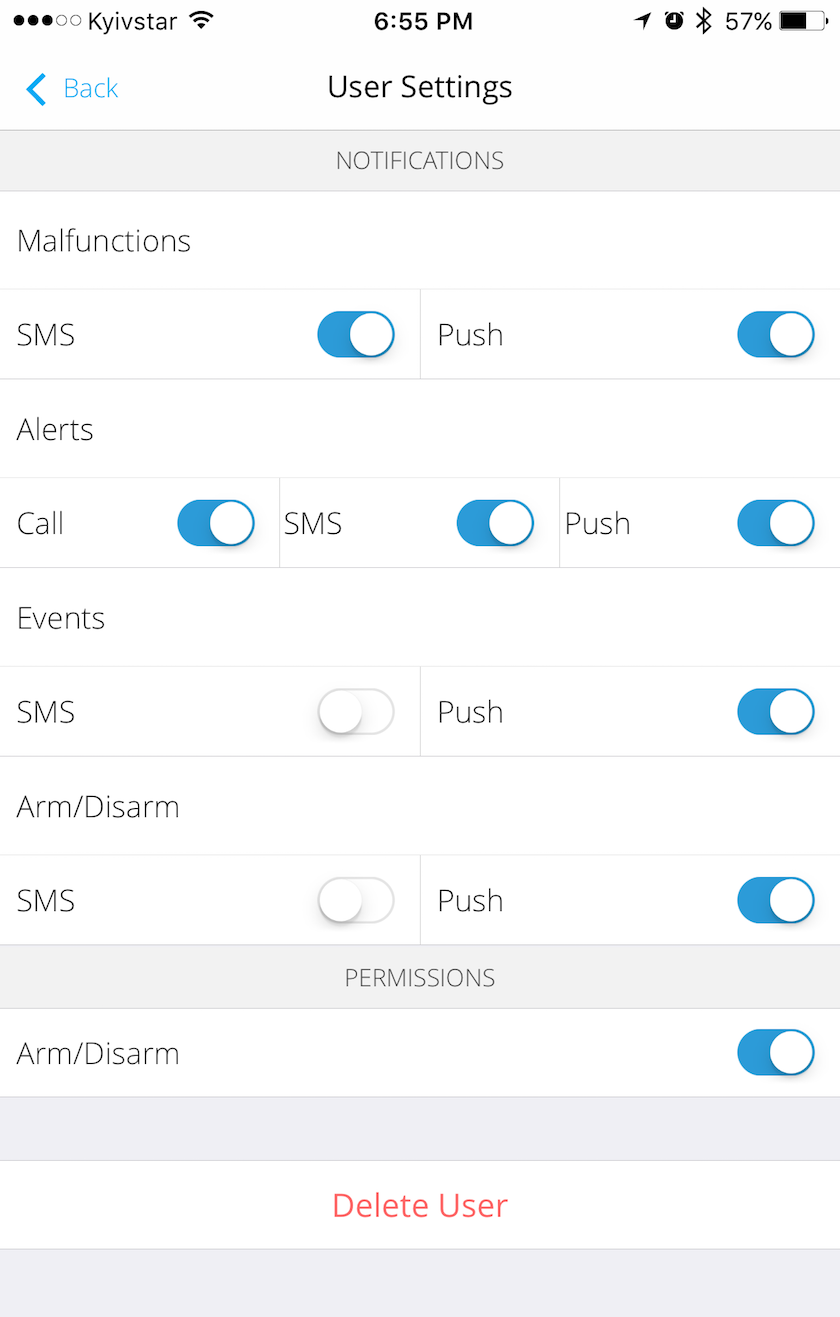 Example of window with notifications settings
Users. In this settings item one can add, delete or change privileges for users who have access to your hub. Only the administrator can add devices or adjust them. One can give privilege for other users to switch on the security mode of the hub. There is a possibility to add up to 10 users. Besides, in this menu item one can adjust the notifications type and indicate user notification only in the case of some type of event. Notifications delivery to users is realized using phone call (for the present time to the administrator only), push and SMS. Ajax Hub is able to send notifications of the following types:
- faults — unsealed tampers, dead standby or main battery, malfunction of the device, high dust level in the smoke chamber and other problems with the devices.
- alarms — alarms in the ‘Security switched on’ mode.
- switching on/switching off — notification after switching on or switching off the security mode.
- events — WallSwitch turning on/off.
 This is what phone call from Ajax Hub looks like
I would like to say a few more words about the function of notifications about alarms using phone call. This notification channel has become available for iOS applications beginning from version 2.5. After one of the devices detects some kind of event except push-notifications or SMS, you will receive a phone call from the SIM-card number, installed in the hub. Unfortunately, this call will not contain any details about the device that detected alarming event. After you pick up the phone, Ajax Hub will automatically end the call. Apparently, this function is additional, and its purpose is to draw the attention of the user to the phone; the user will check application or incoming SMS and see what happened and where exactly.
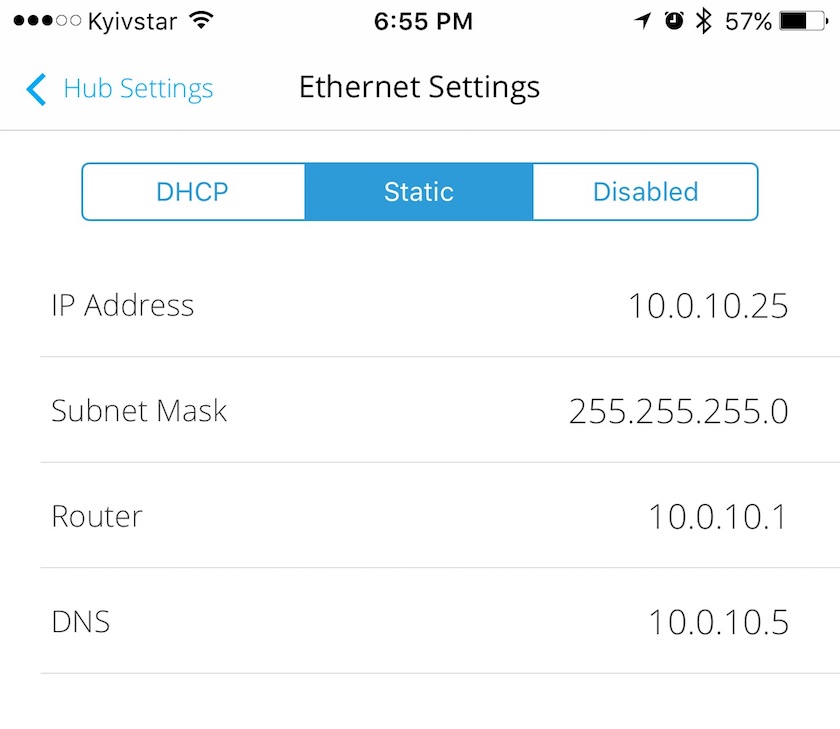 Ethernet settings
Ethernet. There are three options available here: automatic receipt of parameters for connection to the Internet from the DHCP server; entering IP address, run mask, router IP address and manual IP address of DNS servers input or Ethernet disconnection. The last option is appropriate for use, for example, if the hub is installed in a cottage or when normal Internet connection is not available. In this case, the Ethernet-module can be switched off to save battery charge, if there is no electricity. One can switch on the Ethernet connection by entering settings of the main through the GSM-channel. If the connection with the hub is entirely lost, Ethernet can be switched on by resetting the Ajax Hub settings to default.
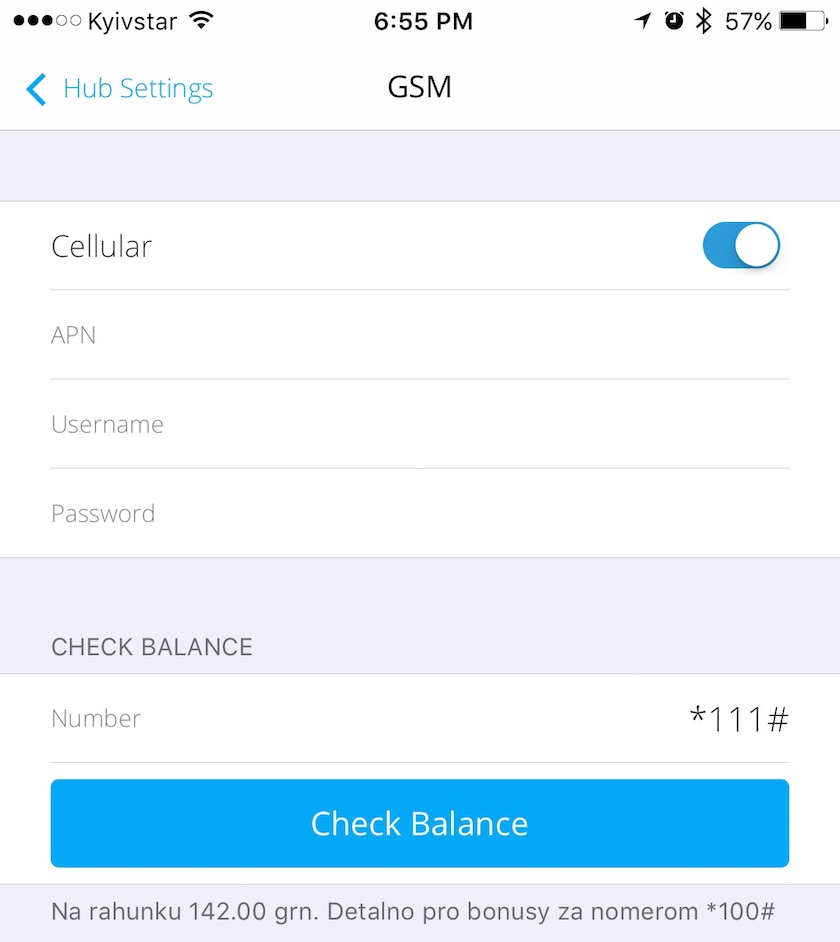 Settings of access to cellular network
Cellular data. Access point is written in this settings item for the start of data burst transfer. For those Ajax Hub owners who were lucky to buy the hub with a Kyivstar card with the Sensor tariff plan, there is nothing to prescribe. In the network of this mobile operator, there works a service of automatically settings determination and cellular network will understand by itself through which access point to give Internet access to the hub. The user can check his account balance using the same menu item.
Geo zones. There are two sub-items in this menu: GPS and iBeacons. Geo zones can be used for notifications about the necessity to switch on the security system each time you leave the apartment or house. If necessary, the user can switch on reminder to switch off the Ajax Hub security mode each time you come back home. The setting is easy: it is necessary to mark the area, entering which the notifications will work, and then activate them. That’s it, the setting for GPS is completed. And if it is more or less clear with the first part, the second one is more interesting to me personally.
 Example of notifications when using geo-fences on the basis of GPS
As the second method for setting up your location relatively to Ajax Hub and informing about switching on or off security mode, the iBeacon technology can be used. This technology was developed by Apple. Its main point is that iOS based devices can execute some kind of actions, when they enter reach zone of sensors, which support the Bluetooth LE technology. Roughly speaking, it looks in the following way. There is some quantity of iBeacon-sensors in your house or apartment. The Ajax application on your iPhone detects their signal and understands that it is in the home zone. If you leave your apartment or house, the connection between the application and sensors will be broken, and the Ajax application will offer you to switch on the security mode. You will be offered to make a reverse action when the application detects a signal from sensors, after their disappearance. It means that you came back home and it is quite appropriate to offer you to switch off the Ajax Hub security mode.
If, for some reason, the accuracy of the geolocation is critical to you, then the second option will be more preferable, because it allows the accuracy of the application’s snapping into action to be significantly increased. For example, when using GPS, the application will offer you to switch on the security mode on the main after you have driven half a kilometer from your apartment. In the case of using iBeacon, the notification will snap into action after you enter the stair landing. When writing this article, I arrived at the idea that it would be quite good to order three iBeacon-sensors and experiment with this technology.
Reach zone test. One can realize reach zone test for detectors in this Ajax Hub settings item. This operation can be realized for MotionProtect, CombiProtect and DoorProtect. It is not available for LeaksProtect and FireProtect, because these detectors don’t have a reach zone per se – they snap into action only in the event of direct influence on the integrated sensors.
Jeweller. This item contains settings that can be used to set up the work of the hub with the detectors more accurately. The “Frame period (sec)” option is the interval of the detectors sampling. By default, it is set up for 36 seconds. It means that each 36 seconds Ajax Hub contacts the detector for transferring and receiving information: readings of the temperature sensor, battery charge, quality of receiving the signal or command for security mode switching on/off. However, this option doesn’t affect the speed of the alarm messages transfer, these messages will be immediately transferred to Ajax Hub. Increasing the frame period will have a positive effect on the duration of work from the battery, but it will decrease the speed of the data update about the device in the application and security mode switching on/off.
One can indicate the quantity of missing attempts of device sampling in the “Quantity of undelivered pings to consider device as lost” item, and when they have exhausted, the hub will generate notification about device lost. Based on the information from this menu item, one can calculate the time after which the hub will generate signal about detector lost. The time until transfer of the signal about detector lost is equal to the frame period multiplied by the quantity of blanks plus one ping. That is, with default settings we will have the following: 36*(8+1) = 324. Therefore, the signal about the detector lost will be generated 324 seconds after the time when the first ping is lost.
Service. “Notification filter about losing connection with the hub” is responsible for the time period after which you will receive notification in the application that the connection with the hub is lost. “Interval of hub sampling by server” indicates when the counter of notification filter about losing connection with the hub will turn on. The example for tweaking these options: Ajax Hub is installed in a cottage where mobile communication is the only connection channel with the outer world and the coverage is not of high quality. Time calculation until message generation about losing the connection between the hub and server can be calculated from the following formula: interval of the server sampling by the hub multiplied by three plus the number of seconds in the notification filter about losing the connection. With default settings we will obtain: 3*30+300 = 390. The minimum adjustable time is 60 s. Interestingly, you will know about what has happened to the hub in a few minutes and it is a very short time as compared with the similar products. For example, the minimum main sampling period in the Luni security system is 5 minutes.
“Firmware group” — exceptional service option. Before producing the release version of the firmware, release-candidate is available to beta-testers by this parameter. It is not a good idea to change it without assistance. Firmware group 0 means that the hub will be updated up to the firmwares distributed through channel with stable versions.
“Hub logs”. This option is responsible for transferring logs from the main to the Ajax Systems server. Here one can turn on this option and choose channel. Now it can be only Ethernet, in the future Wi-Fi will be added to Ajax Hub Plus. Logs are not transferred through GPRS/EDGE on the grounds of saving traffic.
Application for Android
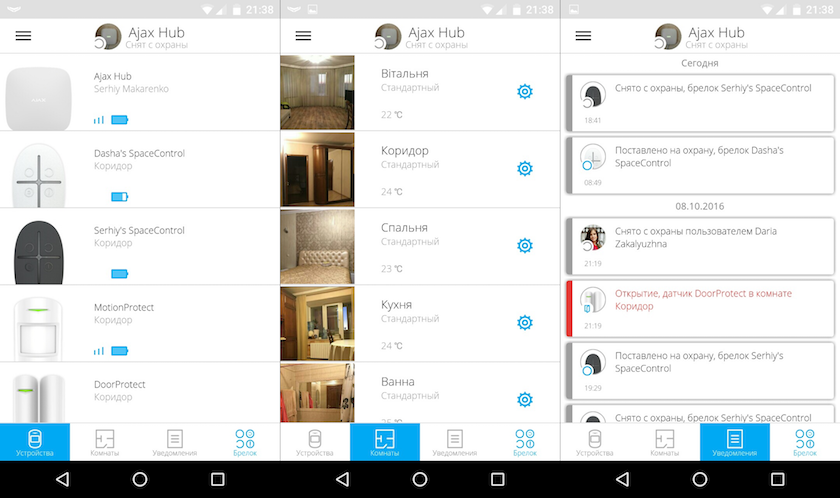 Examples of screens in Ajax application for Android
In general, application for Android is similar to the same application for iOS both in terms of functionality and from the viewpoint of design and work displays organization with a small exception. There is no support of iBeacons in the application for Android and it is obvious why.
app.ajax.systems web-application
The functionality of the web-application for Ajax Hub and devices management is similar to applications iOS/Android, except for the fact that it isn’t possible to switch on notifications using phone call through it and there is no possibility to configure the geo zones on the basis of GPS and iBeacon.
 Virtual key fob
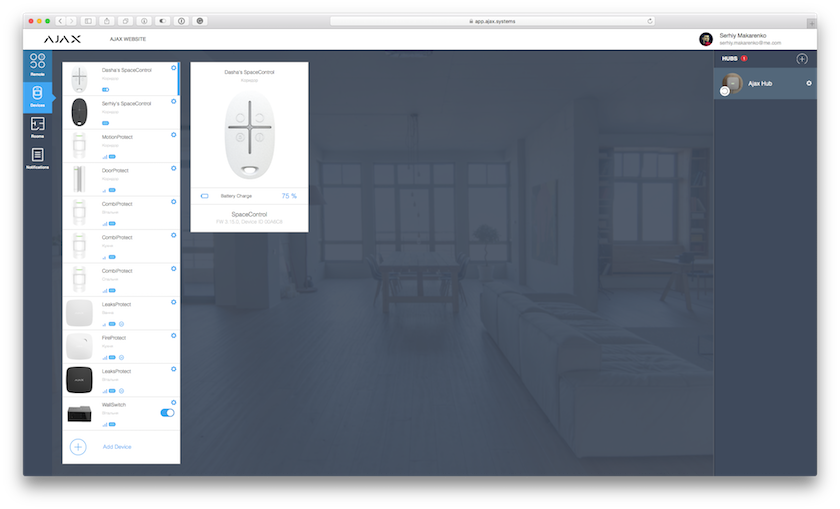 Tab with devices
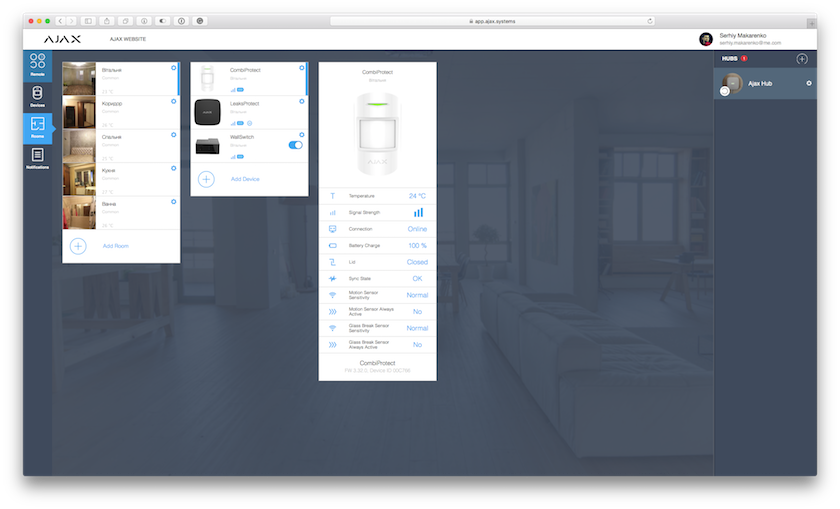 Tab with rooms
 Tab with notifications
First switching on and setting up Ajax Hub and detectors
From the moment when I opened the box with Ajax StarterKit and until “putting the system into operation”, i.e. bringing it into a state that allowed me to start using the system, I spent less than two hours. Basically, I spent time to choose a place for attaching detectors, to adjust and test them.
Setting up Ajax Hub
It took me fifteen minutes to set up Ajax Hub. After I took it out of the box, I connected power supply and began to add a new device to my home network. I would like to mention that if you don’t know what the phrases “home network configuration”, “home network” mean, you will not have any problems.
Connect the hub using Ethernet cable from the set to the LAN port in your router and Ajax Hub logo will almost instantly change red light to green, if the Internet connection is correct.
If the configuration of your network is a little bit more complicated, delays can occur, which could be avoided. The thing is that there was no label on my hub under SmartBracket that would give me the serial number of the hub, its Mac-address or IMEI GSM-module. Although in most cases you don’t care about the serial number and IMEI, the MAC-address can be very useful.
Because in my home network I don’t have a pool of addresses which are provided left and right, I had to sit in front of the console of my home Linux-server and look through the DHCP server logs waiting for DHCP DISCOVER to come from Ajax Hub so that I could copy the necessary MAC address and add it to the configuration of the server (later I discovered that it is possible to ask the support service about the MAC address – you only need to indicate ID of the hub). The case is not unique and maybe you will need to search the necessary MAC address in the table of MAC addresses of your router or in the logs of the DHCP server. So be ready for this. When I asked why there was no information about this, I was told that these labels would be installed on new Ajax Hubs. So, I hope you will be lucky.
After my Ajax Hub appeared online, it could be added to the application. It can be done very easily. You need to take a photo of the QR code on the back cover of the hub using a smartphone integrated camera, and the code will be available in the program. Let me remind you that you will have to pass through the registration process. The user, who is logged in the application automatically after adding a new hub, becomes its administrator.
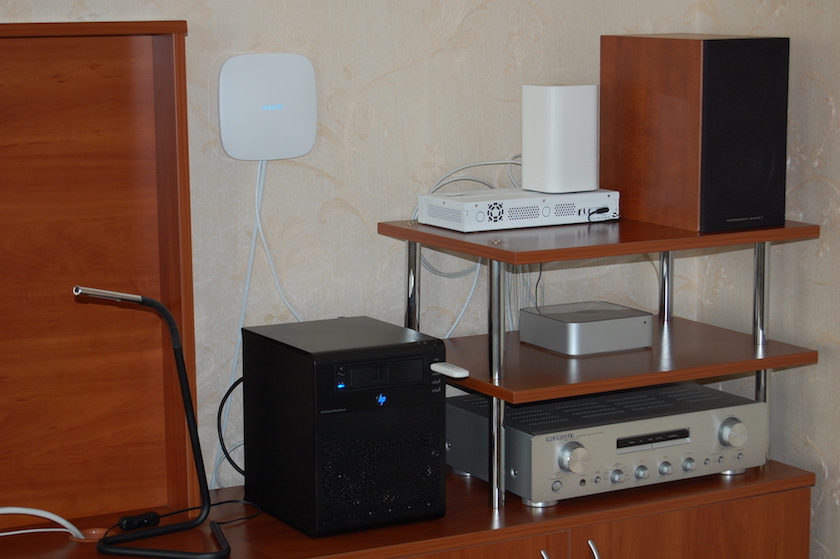 Ajax Hub attached to the wall in the living-room
I didn’t think much where to place the hub and decided to hang it on the wall of the living room. This is a great spot for several reasons. Firstly, as I already said, Ajax Hub looks great and it can become a sort of interior decoration. Secondly, it is not a good idea to locate it in the room where you sleep, because the logo’s shine in the darkness is bright enough to disturb you. Thirdly, the length of the Ethernet cable significantly limited me in the choice of the place for mounting the hub, and I had to locate the main closer to the router.
I attached SmartBracket on the wall using 3M double-sided sticky tape, which was delivered as a part of the Ajax Hub installation kit. I intentionally avoided mounting with screws, because the apartment was for rent and I didn’t want to spoil the landlord’s property. I must say that the main securely holds on. After SmartBracket was attached, I still couldn’t tear off the hub. Or rather I stopped trying to do this when I felt that the wallpaper is just about to be torn. Such reliability of mounting quite suited me.
Setting up detectors and key fob from Ajax StarterKit
Here everything is even easier than in the case of setting up Ajax Hub. Broadly speaking, the process of new detectors registration comes to scanning the QR-code on the body, switching on the detector, assigning it to the respective room and entering the name for displaying in the program. That’s all. I have done these manipulations with MotionProtect, DoorProtect and SpaceControl.
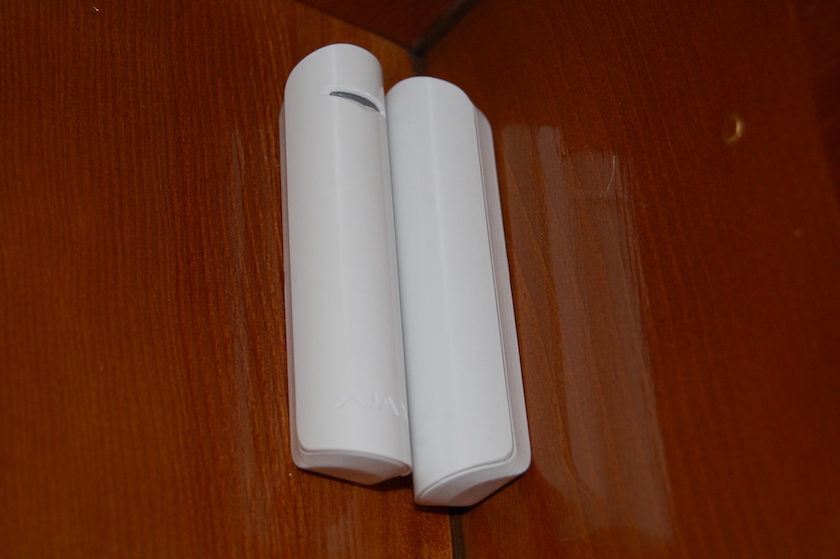 DoorProtect, attached to the inner side of front door
When all the devices were added, I started to choose a place in the apartment for attaching them. I began with DoorProtect. We have a double door and at first I attached the detector inside the door frame to trace the inner door status. This decision was in the first place dictated by the fact that at first it was necessary to test the detector and to understand how it works. Later on, when all the tests which I wanted to do were completed, I came to a conclusion that I did not need remote wire detector and I decided to attach DoorProtect to the outer door. It was very difficult to do because of the excellent quality of the assembly sticky tape. Using ordinary fast hairdryer, I was able to weaken the grip of the glue and both sides of the detector were attached to the new place.
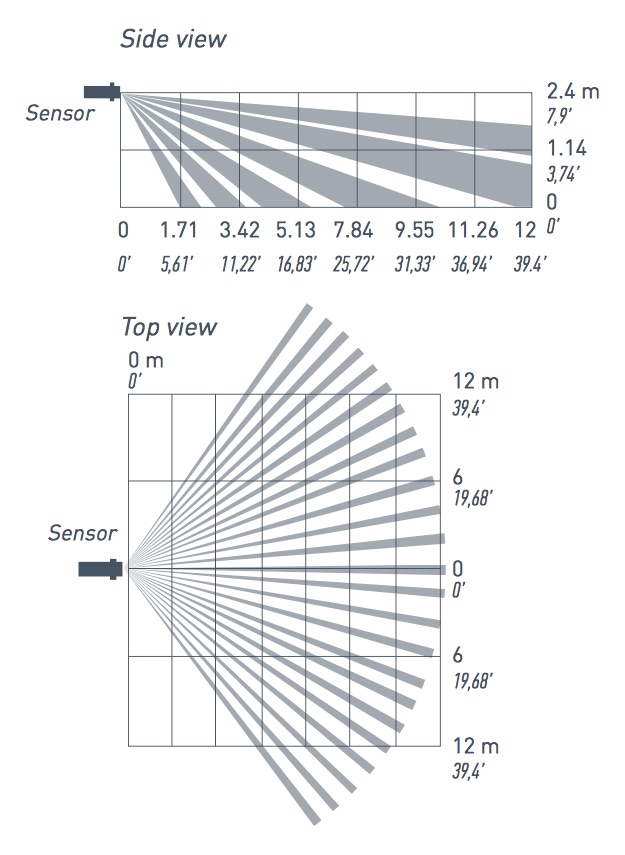 MotionProtect reach zone
I decided to attach MotionProtect in the corridor. I attached SmartBracket using assembly sticky tape in the corner of the corridor to the right from the door according to the Ajax Systems recommendations. It is better because the diagram of the detector view will cover more space. After I was sure that the detector was securely attached to the wall, I performed the test of reach zone detection. As a result of the test, it was determined that there was no place in the corridor where an intruder could stay unnoticed. Although we don’t have pets, I have chosen medium sensitivity level.
Setting up detectors not included in Ajax StarterKit
As was mentioned above, the detectors that aren’t a part of Ajax StarteKit are CombiProtect, LeaksProtect and FireProtect. Adding CombiProtect is realized in the same way as MotionProtect with the only difference: when attaching them, you need to take into account the fact that these detectors need to detect the sound of glass break additionally to detecting motion. That is why it is better to locate them at least in rooms with windows. In my case, three CombiProtect detectors were located in the bedroom, living room and kitchen. All of them were attached in the distant corner from the windows using double-sided sticky tape, which is a part of the installation kit. After testing the reach zones, I determined medium sensitivity levels in each detector.
I conducted tests of the glass break detector snapping into action in accordance with the procedure specified in the instruction to the detector. Besides, I strongly recommend you to read the instructions, which are provided with the detector. They are written excellently and contain exhaustive information about the setting up, construction, attachment and detector care.
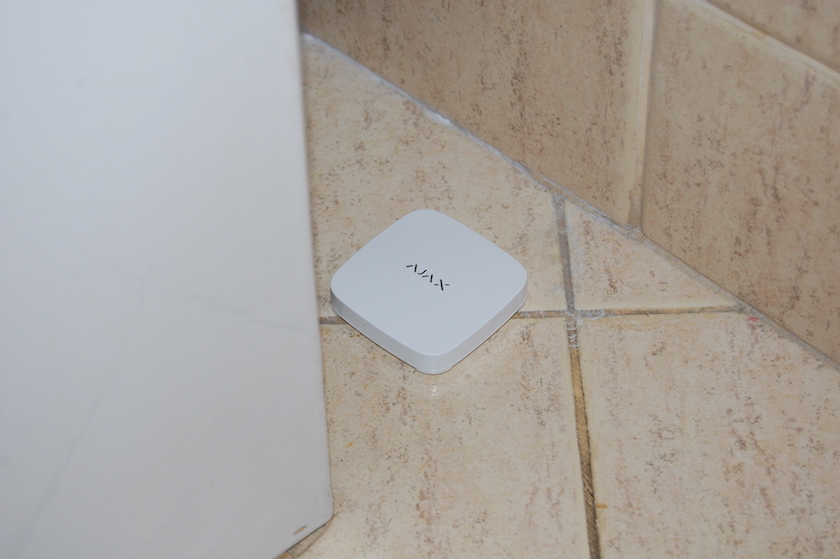 LeaksProtect in bathroom under the washing stand
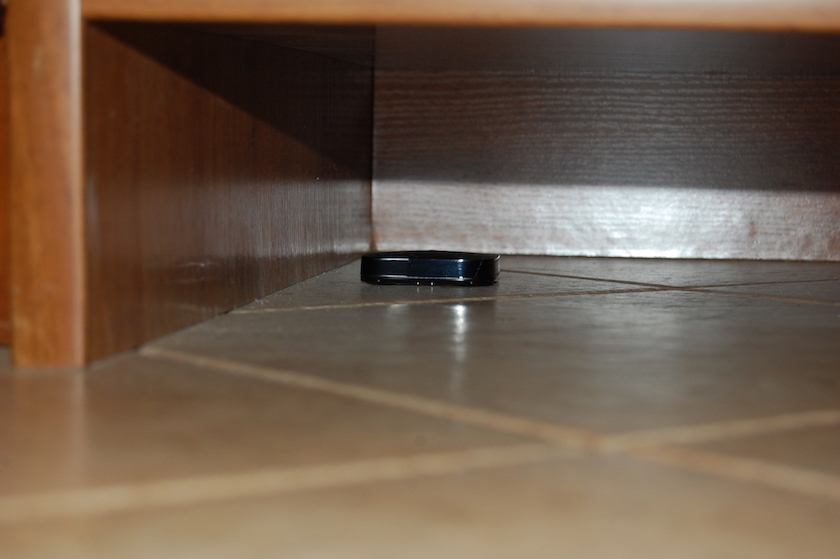 LeaksProtect in the corridor
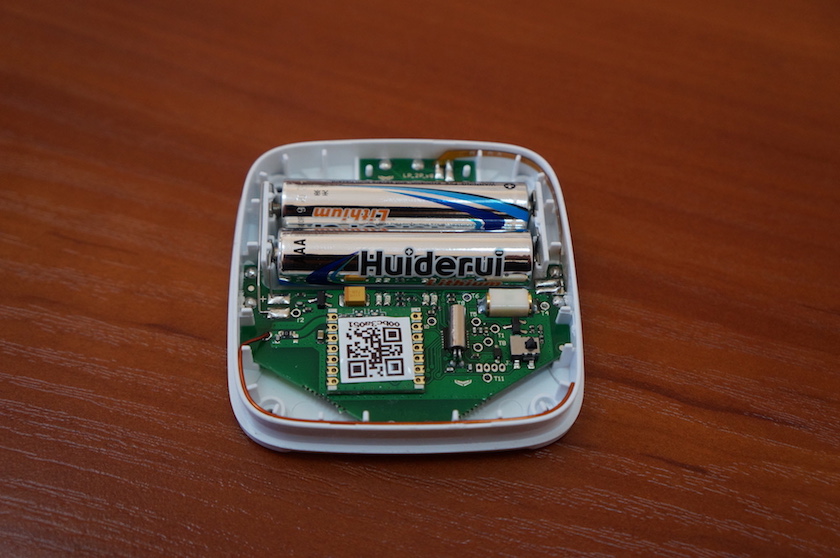 If it is necessary, batteries can be easily changed
The white-color LeaksProtect was tested first. For some reason, I managed to add it only at the third attempt, even though the process of adding was conducted in the living room, where Ajax Hub was located. Most likely, it is because the release-candidate firmware version and not release version was installed in the detector. After adding, the detector was attached in the bathroom under the washing stand. It is worth noting that I took LeaksProtect to Ajax Systems at the beginning of September, because it had small malfunctions and the motion sensor was switched off. Ajax Systems explained this temporary switching off by the fact that the motion detection algorithm was not quite perfect and, as a result, even in the event of insignificant detection of location changing it might spam users with notifications. After installing other firmware, LeaksProtect passed the second registration process without problems. The second detector was placed in the hall under the wardrobe. This is the assumed place of flood, which was marked by our upstairs neighbors.
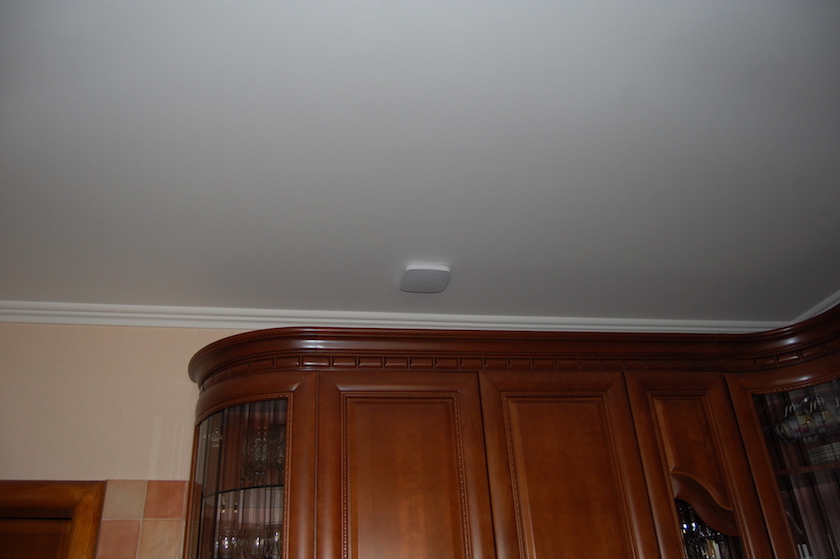 This is how FireProtect looks in my kitchen
FireProtect was attached in the kitchen. I have chosen this place of attachment because it is here that most incidents which need human interference usually happen. For example, the detector can notify about burnt or slightly burnt food on the frying pan before the property is damaged. For example, if someone puts a frying pan on the stove to warm up some food and forgets about it. In the process of attachment I was guided by merely practical aspects, rather than paranoiac considerations. The detector itself was also attached to the ceiling with the help of two strips of assembly sticky tape. After the SmartBracket fastening was stuck, I made an attempt to tear it away together with the already attached detector. Almost immediately, I understood that it was not easy and, to take it off, I would most likely have to use the hairdryer, which had come in very handy when I attached DoorProtect. After the attachment, the detector was tested using the Test button and the procedure described in the supporting instruction.
Operating experience
Perhaps, in this section of the review there will be the most interesting information for potential buyers of the Ajax StarterKit security system and, in my opinion, some useful information. If trying to briefly characterize the product from Ajax Systems, I can say with confidence even now that it is a good system that doesn’t have analogs in its class, which practically draws no attention after its attachment and setting up.
Ajax Hub
In the course of the initial set-up, I ignored the Kyivstar SIM card, which was a part of the Ajax StarterKit set and put Internet SIM-pair in the hub (it was registered at my wife’s phone number). I had very simple motivation: I didn’t want to have any hassle with a separate prepaid card or to follow the state of her account. It was tiresome. However, an incident happened that clearly showed me what could happen if I neglected recommendations of the producer.
On the 31th of July, at 16:46 I noticed that the hub for no apparent reasons had notified me about a loss of connection with the Ajax Systems server. I discovered it because the light-emitting diode indicator was red. My natural reaction to what was going on was to try and check the status of the hub, since there was no problem with the Internet access in my local network. To do that, I decided to use iPhone application, but it came to nothing because the program notified me about the connection error to Ajax Hub: socket close by remote peer. Half an hour later, I was able to use the iOS-application, but when the screen with the devices opened, there was only some HUB NUMBER ONE, which was unknown for me. My devices and rooms were absent.
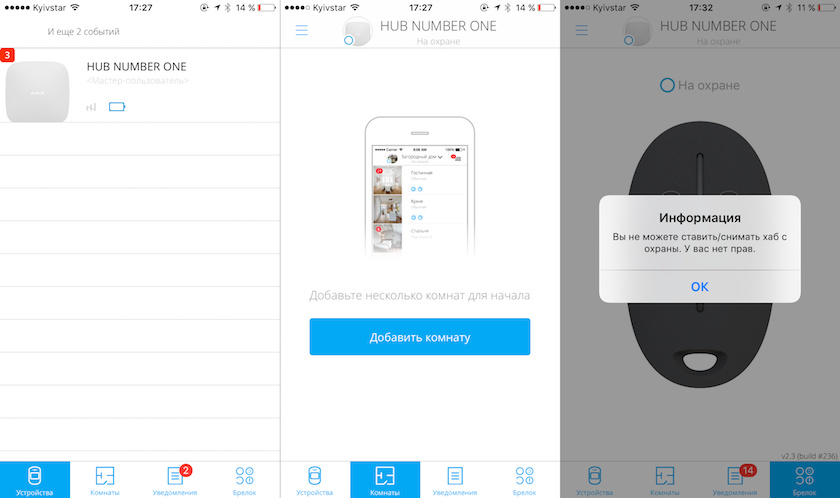 Mysterious HUB NUMBER ONE without traces of my configuration
I could do nothing with the hub using the application, but I could switch on the security mode through the SpaceControl physical key fob. It is interesting that being in the switched on security mode, this HUB NUMBER ONE was sending me push-messages in the application from the devices located in my apartment. This behavior gave me all reasons to assume that if my hub was with switched on security mode, I would receive messages anyway through SMS during the accident and the security functionality would be minimally damaged.
 Receiving notifications from my detectors after the accident
In this connection, I strongly recommend the readers to put the SIM card from the set in Ajax Hub. If there is no SIM card in the box, buy a Kyivstar SIM card with the Sensor calling plan and put it in. Services included in this calling plan (calls, SMS and volume of packet data) are enough to provide the hub with channels for notification transferring about any alarms that may occur. Had I had a SIM card from the set in my hub from the beginning, I would have known about the connection loss between the hub and the server through SMS. It could have increased the operational reliability of StarterKit significantly.
After I reported about my problem in twitter (I marked Ajax Systems account), their specialist got in touch with me by phone and during brief conversation we returned the access to my Ajax Hub. After I successfully logged in through the mobile application, my entire configuration was there, including the user settings and the rooms with the detectors that had been created earlier.
According to Roman (the engineer with whom I had a conversation through e-mail), the problem appeared due to a bug in the operation of the Ajax Systems infrastructure at the Digital Ocean facilities. The problem was diagnosed and eliminated; however, owing to this accident, a part of the users configuration couldn’t be read properly by the application (as you already guessed, the configuration of my hub was one of them) and due to this, instead of my Ajax Hub there was HUB NUMBER ONE. Ajax Systems engineers also mentioned that even during this accident, the security functionality was working in the normal mode (I could see it myself) and notifications about alarms were transferred from the hub to the users through the channels that are not dependent on the Ajax Systems infrastructure, i.e. using SMS.
During the conversation, I discovered that in the July-August Ajax Systems, the company conducted phased migration of its infrastructure from Digital Ocean to Amazon. This step was undertaken to increase the reliability of Ajax System. Besides, I would like to emphasize that in spite of the problems that occurred, the Ajax support service didn’t hide any information, returned access to the configuration of my hub quickly enough and told me about what was going on. As a person who bought Ajax StarterKit, I can focus on several aspects. Advantages:
- Quickly connected with me and solved the problem;
- Gave me a full report about what was happening;
- Told me what they did to ensure that this problem would never happen again;
- The system continued to work in the autonomous mode (in the event of unauthorized brake in the apartment, I would receive notification anyway if I used SIM card from the set);
Disadvantages:
- The fact of the home security system breakdown;
- It is impossible to reach the hub settings in this case;
- Full inoperability of the channels, except those which don’t depend on the Ajax Systems infrastructure (SMS and phone calls);
What did Ajax Systems do two months later to avoid the problem I told you about? The company fully removed its infrastructure from Digital Ocean to Amazon. Now Digital Ocean is only used for the proxy server, which receives connections from the clients’ hubs. In the near future, it will be removed to Amazon. Due to this step, Ajax Systems excluded any reoccurrence of such incidents. Besides, mobile applications for iOS and Android were updated. These updates contain improvements which eliminate errors in reading the hubs configuration. I must say that Ajax Hub has been running like clockwork for two months now.
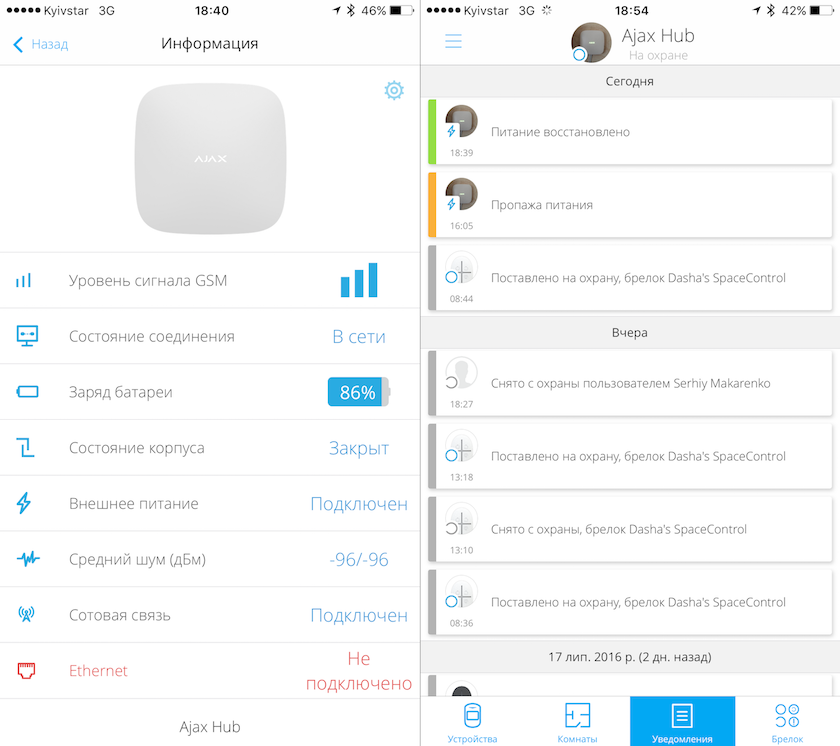 Example of power supply disconnection
Now, let me say a few words about the hub autonomy. During the exploitation period, I had a case of power failure because of the damage of the transformer near my house. At that time, the hub had been working for two and a half hours in the autonomous mode and the battery had run down 14%. When the power supply was available again, the alarm signal disappeared and Ajax Hub continued to work in the regular mode. Besides, I conducted an experiment and measured the operation of the main in the autonomous mode. I simply disconnected it from the power supply. During the experiment, the hub was working with the switched off security mode most of the time and approximately one hour with the switched on security mode. The time of autonomous work until full shutoff of the hub was 7 hours 11 minutes. The same experiment of the main disconnection from the AC network was made by Yura Novstavskiy, who bought Ajax Hub a few weeks after I did. His result was better - 8 hours. But there are fewer devices connected to his hub: four detectors and one SpaceControl. In my case, eight detectors and two key fobs were connected to the hub. A lot of factors influence the time of autonomous work, the main of them are mentioned below:
- Frame length;
- Number of active detectors;
- Number of operating channels (two or one, and which exactly);
- Distance to the main station;
- Power at which the modem works.
A little bit later, during the conversation with the technical support service, I discovered that the switched on Ethernet module had a significant influence on the time of autonomous work. And if there is no power supply, it doesn’t work because the router doesn’t have power supply (in the majority of cases). During this experiment, I didn’t switch off the hub from the router and, as a result, the storage battery in the main had to run down faster. When I repeated the experiment but without the Ethernet cable, the hub worked for 9 hours and 1 minute.
From the viewpoint of cost effectiveness and convenience of use, I had only one complaint about the hardware-based utility. By the light-emitting diode indication on the main it is not very clear, in what state it is now: security mode is switched on/off or partial security is switched on. Since there is no keyboard to the Ajax security system, this indication would be very helpful. Unfortunately, you can only understand in what mode your security system works now without using the program if your system is equipped with HomeSiren.
MotionProtect/CombiProtect
A few words about the installation kit. It is good in everything and it gives an opportunity to choose among several options of attachment methods both for the hub and for detectors to practically every type of surface. However, there are a few natural limitations. For example, on the first day after I attached and set up CombiProtect, my wife and I encountered a very interesting problem. The alarm went off in the afternoon. Since we had not assigned Ajax Hub to the control panel of any security company, there were no consequences except slight fright because of the fact that the alarm had snapped into action. One of the CombiProtect detectors reacted; it was located in the bedroom. What is more, its reaction was very strange: at first, the detector detected motion, and then glass break. Both these events happened at an interval of three to four seconds. Although my wife was scared, I was confident that this was not a burglar (otherwise, the detector would have detected glass break first, and then there would have been motion). There was something wrong with the detector. When I came back home I understood what it was all about.
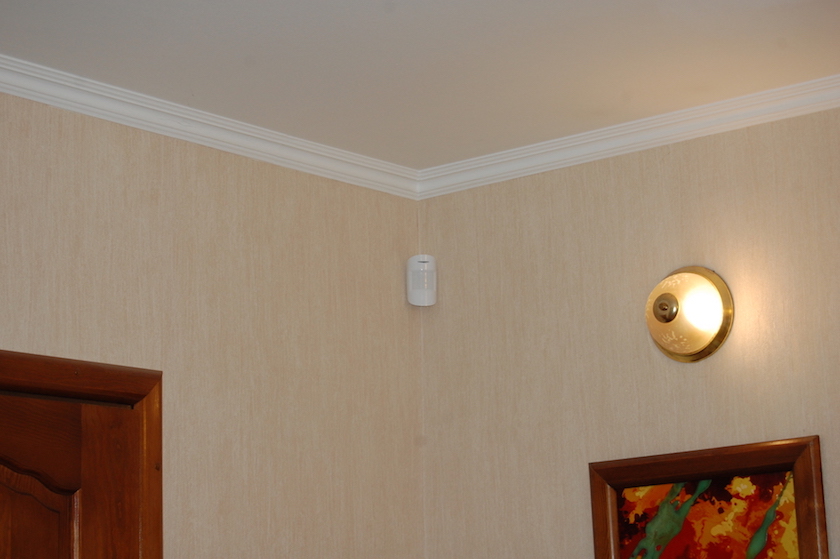 MotionProtect in the corridor
I decided to attach the detector to the wall above the bed. There was a sliding-door wardrobe with mirrors-like leaves to the left of the detector. SmartBracket stuck badly, because we had smooth wallpaper with rare deep stripes in the bedroom. Having hung all night, the detector just came unstuck at approximately 3 o’clock p.m. and fell down. Naturally, it detected motion while falling (because all the room began to move relatively to the detector itself), and after falling off the bed, it rolled on the floor half a meter and hit the glass door of the wardrobe. That is why it sent us a notification about glass break. So be careful when attaching the detectors. If you attach them using double-sided sticky tape, conduct some kind of minimal strength experiments to save yourself the trouble in the future. Finally, I had to additionally fix the detector in the bedroom using one screw in addition to two stripes of the double-sided sticky tape. My advice: if possible, attach SmartBracket to the walls with the help of screws. This safe attachment type will save you from unpleasant surprises, like those I had myself.
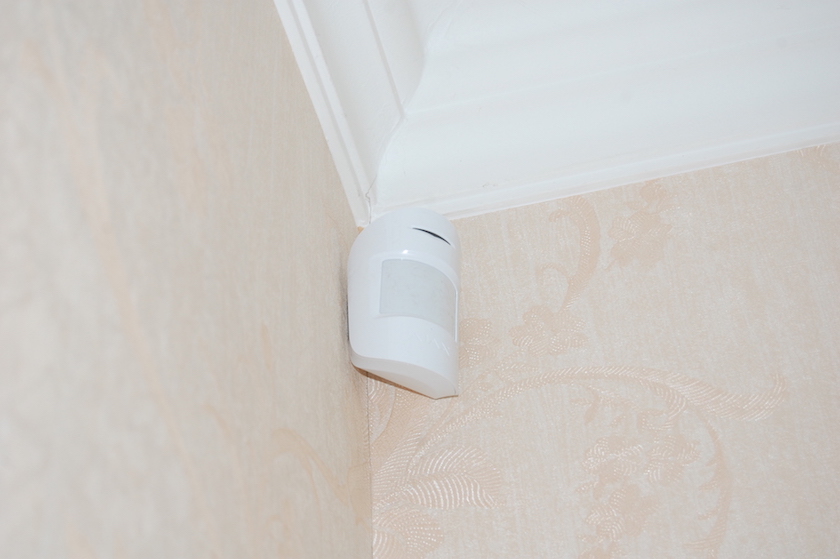 CombiProtect in the living room
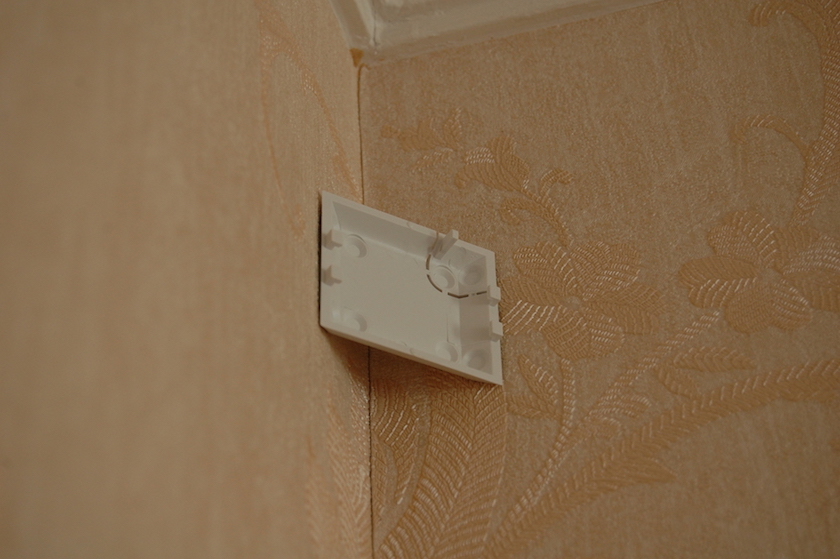 SmartBracket from CombiProtect, attached to the wall
Now a little bit about the temperature values. Yura Novostavskiy experimentally discovered that the temperature indication in one of CombiProtect connected to Ajax Hub displays an overestimated value by 2°С. This is not a crime, because the temperature sensor in the Ajax Systems detectors is present in the microcontroller chosen by the company, and it is used to calibrate the temperature drift. Because this function is a secondary one, these detectors were not calibrated. Based on the data about the used circuit technique, the company wrote that inaccuracy can be within a range of ±2°С. The test that was conducted by Yura was very easy. He gathered all the detectors in one place and measured the temperature after one hour. He compared these data with the digital sensor on the basis of Maxim DS18B20 (the producer declares ±0.5°С in the temperature range from -10°С up to +85°С and a little bit worse quality in range from -55° up to 125°С). To exclude any doubts about the accuracy of the experiment, two DS18B20 sensors were used. All the Ajax detectors showed even temperature with the exception of one CombiProtect - it showed the temperature higher by +2°С; then the test was conducted again, but with a little bit different temperature of the environment. The result was the same. After this, Yura placed the detectors where they belonged and made two more checks (yes, he was very persistent) of MotionProtect and “problematic” CombiProtect using DS18B20 sensors (they were attached to the bodies of Ajax detectors an hour before the test). The result was the same again. His CombiProtect raised the temperature value by 2°С within the range between +20°С and +28°С. Personally, I haven’t made such kind of measurements on my detectors, because inaccuracy in ±2°С is quite acceptable for me.
FireProtect
Now, a few words about the experience of FireProtect exploitation. I attached it to the ceiling in my kitchen. As I wrote, I attached it securely, but I didn’t want a repetition of the situation with the detector in the bedroom - the detector could fall on the tile floor (it would definitely crash after the fall). So I attached it to the cover of the cupboard. It has been hanging there for one month now and it still holds tightly. I assume that it doesn’t intend to fall. Moreover, I am sure that I will need to take it down only with the help of a hairdryer. It has an excellent accuracy and speed of snapping into action. Once it went off because of the smoke from slightly burning sunflower-seed oil on a frying pan. After we turned on the ventilation and there was no smoke in the kitchen, the detector stopped sending any alarm signal to the hub.
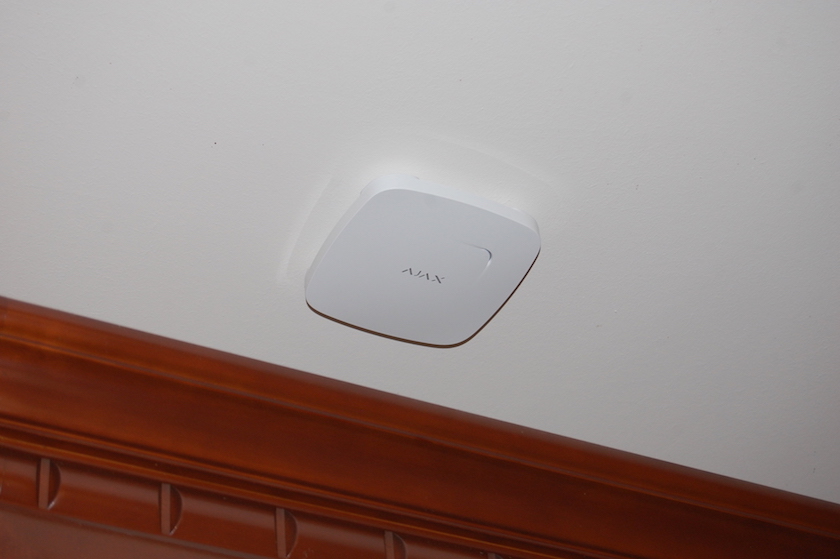 FireProtect attached to the selling
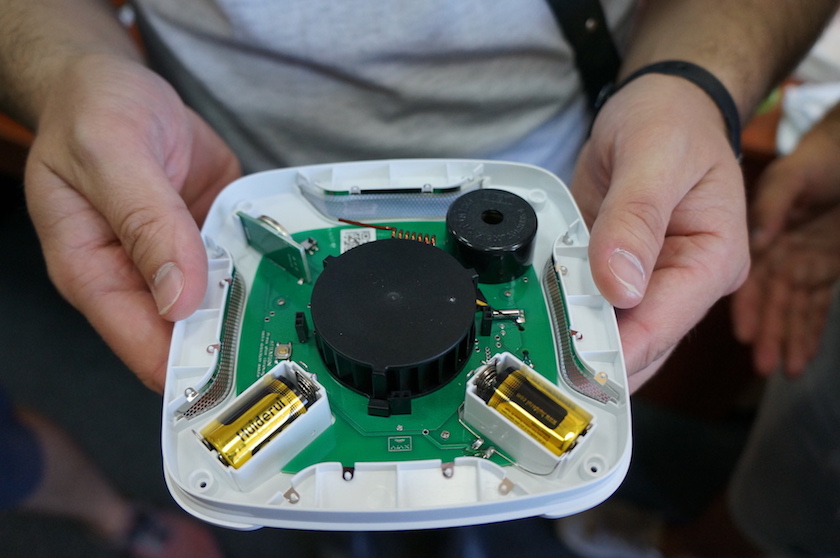 FireProtect from inside
SpaceControl
Now, a few words about SpaceControl. I would like to mention that this small box could have been made smarter. For example, SpaceControl cannot show you the status of Ajax Hub: security mode switched on/off or partial security mode switched on. This brings certain discomfort, and if you are using the key fob together with someone, for example, when you come home with your parents, wife or girlfriend, than there would be a possibility of switching it off and then on again. My wife and I have had this situation several times: we came back home late, tired and had not discussed who would switch off the security mode. As a result, we jumped up to the ceiling because of simultaneous howling of our telephones when we entered the apartment.
Then, when you carry the key fob in the pocket with other things, accidental pressing is possible and as a result the security mode can be unintentionally switched on. It is almost impossible to notice it, because SpaceControl is not equipped with facility of giving sound signals - it notifies the user about pressing the button only with the help of light-emitted diodes. You can understand that you switched on the Ajax Hub security mode only by the alarm signal snapping into action, which will be heard from your telephone. If the hub is connected to the SGS console, the consequences of this kind of disappointing accident could involve an unplanned visit of a security task group. Whether you pay a fine for this accident will depend on the terms of the contract which you concluded with the security agency.
SpaCentrol is small enough and you can accidentally lose it. It could be lost by falling out from your bag or pocket (if it wasn’t attached to keys), and it could get lost in clothes, if you forget to take it out of your pocket. In this case, it is logical to assume that using the application or Ajax website you can at least determine where your SpaceControl is - in the action radius of the hub (it was lost in the apartment among clothes or it is somewhere inside the bag) or it was lost outside of the apartment and there is no connection with it. But no such luck. According to the engineers of Ajax Systems, SpaceControl is always in the sleep mode and it is impossible to read its information by making query from Ajax Hub. The key fob exits the sleeping mode only after pressing the button on it. That is why it is almost impossible to find it if you have forgotten where you could have lost it.
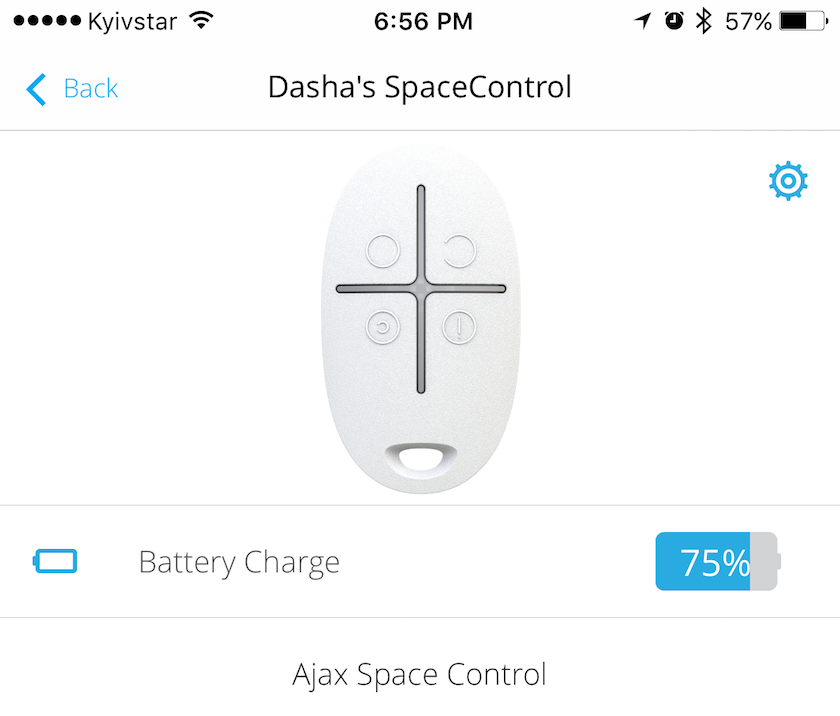 The SpaceControl battery in both key fobs run down in quarter during three months of use
As I mentioned above, the period of autonomous mode from the СR2032 power supply element is up to 5 years. And I don’t know whether you should be happy that the device with the minimal functionality will work for so long, or dream that it will work for six months – a year in autonomous mode, but it would have integrated buzzer for giving a sound signal when pressing the button and the function of detection using buzzer and feedback with Ajax Hub. According to the instruction, the battery in the key fob can be changed, but there is no detailed information about how to disassemble the body without assistance. By the way, an extra SpaceControl costs 454 ₴. I think there is no point in buying any additional key fob, because you can use the virtual key fob in the application instead of the physical one. The value of SpaceControl is that it directly interacts with Ajax Hub and one can administer the hub using the key fob, even if you don’t have a smartphone.
Exterior view of devices
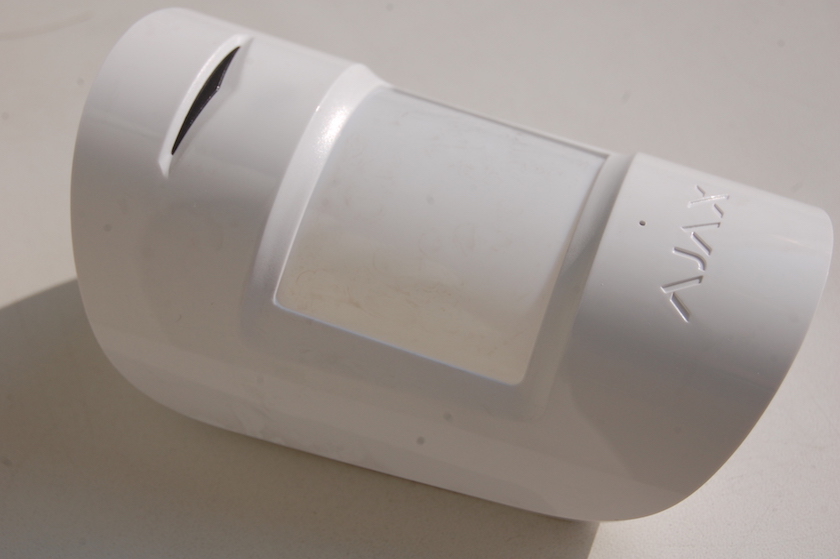 This is what CombiProtect looks like after three months of exploitation
The three months during which I wrote this review, was a rather long period and now I can tell you about how the exterior view of detectors and key fobs have changed. MotionProtect in the corridor and CombiProtect, located in the bedroom, living room and kitchen, became covered with spots of fine-dispersed dust. Unquestionably, this is the defect of white detectors, but there is nothing to be done. The dust had no influence on the detectors’ quality of work. I haven’t cleaned them yet; I am planning to do it in six months, as it was recommended in the instruction. There is no such film on the other detectors and I think it is because the detectors are made of dull plastic.
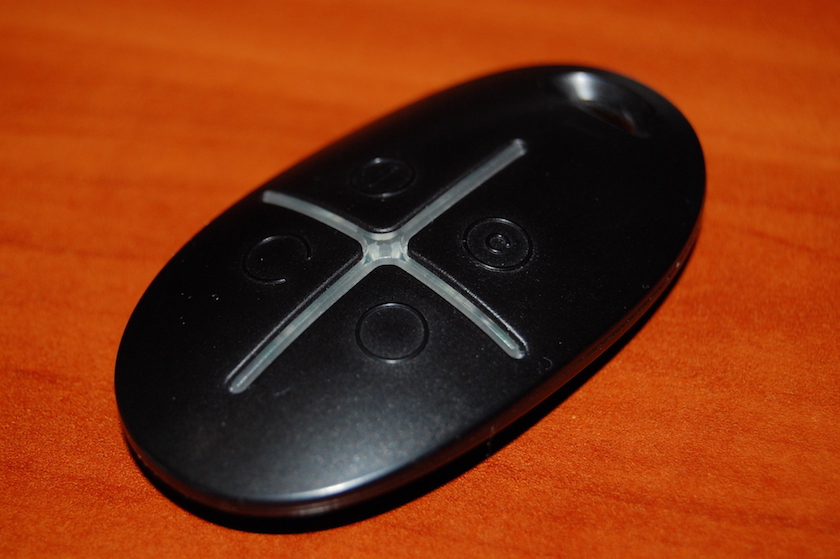 Ajax SpaceControl after three months of neat exploitation
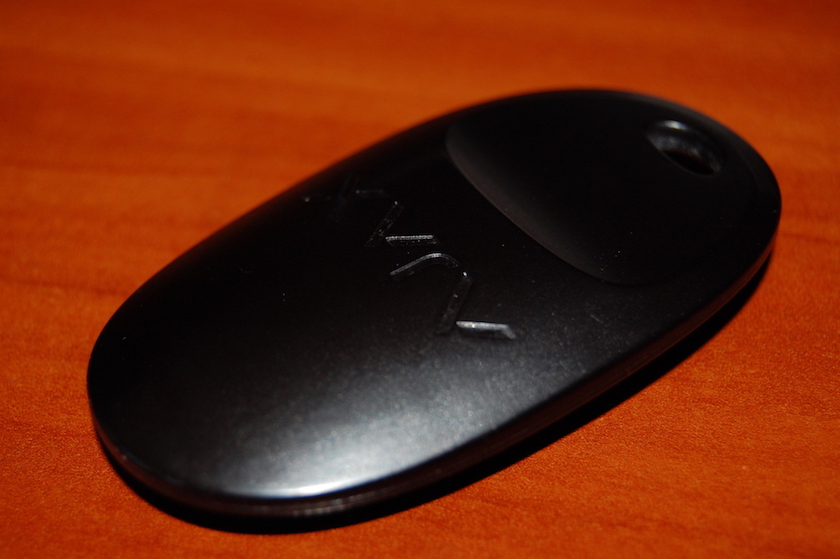 Ajax SpaceControl after three month of neat exploitation (back side view)
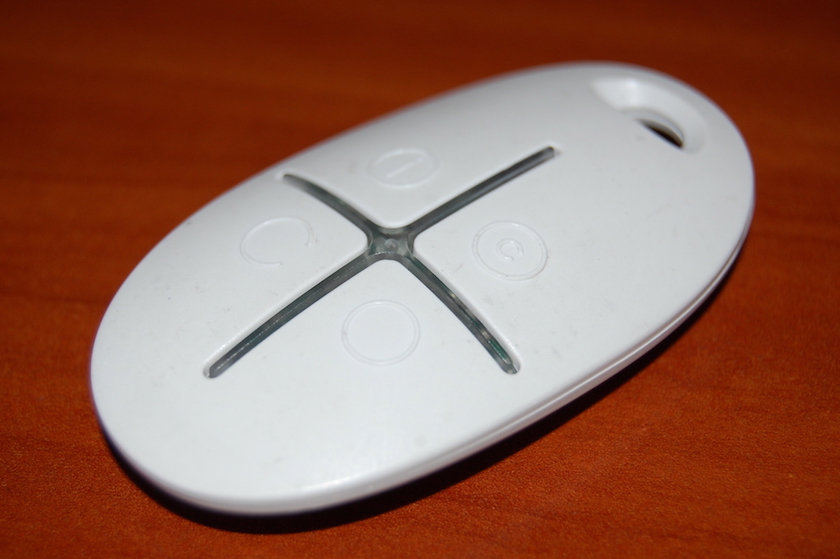 Ajax SpaceControl after three months of carrying it with keys
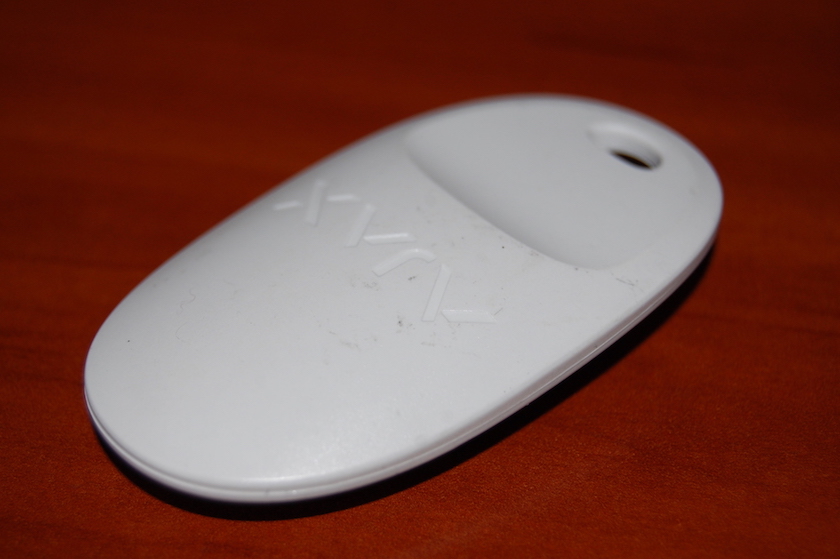 Ajax SpaceControl after three months of carrying it with keys (back side view)
Black SpaceControl looks excellent three months after purchase, but I treat it carefully and carry it in the pocket - I don’t want it to touch metallic objects. White SpaceControl is in a good condition despite of the fact that my wife always carries it with keys and it always rubs against them.
Connecting Ajax to the CMS
I don't want to dive deep into Ukrainian reality and don't want to tire you with a detailed description of the process of connecting Ajax Hub to the CMS of local security companies. For sure outside Ukraine, this process probably completely different. For now, I want to tell you only abut a technical side of this question which respect to your admin user on the hub because I suspect that this part of the process will be similar across the world.
So, as I mentioned before, only one user have full control under Ajax Hub and this is your user which was used when you add hub in the application for the first time. This is mean that only this user can arm and disarm head unit, configure detectors and so on. All this imply that you will need to convey access credentials of this user to security guard company engineer, who will be configuring your Ajax Hub and connect it to the CMS.
For most of you this will be not a problem but for someone, for example, for people like me, that is can bring some inconvenience. The root cause if this nuisance that someone outside your family will have full access to Ajax Hub and can do everything with it. All this unpleasant situation can be partially compensating only by the fact that you will still have full physical control under Ajax Hub and all detectors connected to it.
What comes next?
I couldn’t resist the temptation of learning what awaits buyers who have already bought Ajax StarterKit and people who only think of buying it. And there are a lot of pleasant surprises for all.
Ajax Hub Plus
The difference between Ajax HubPlus and the current version will be in the existence of a Wi-Fi module. Instead of two cables now one can use only one - power supply cable. This will allow increasing the flexibility of attaching and making this use much easier.
WallSwitch controller for remote control of household appliances
Using this device, one can conduct switching on/off of different appliances, which are power-supplied through the municipal power network: teapots, electric taps, sockets, etc. Moreover, one can read statistics about socket power consumption using WallSwitch. Unfortunately, when I was writing this review, I didn’t have this controller, but maybe I will have it soon and I will be able to write about it.
Physical keyboard
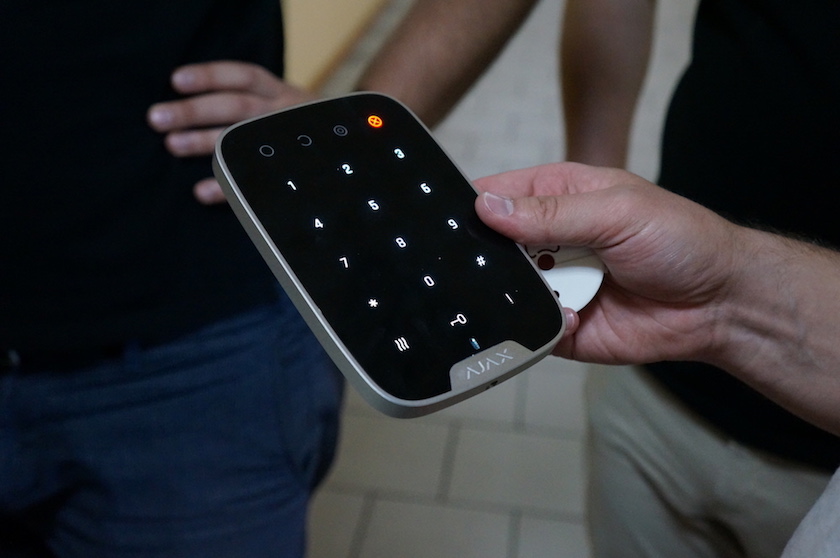 Physical keyboard prototype for Ajax Hub
Some users lack physical keyboard, using which one can provide switching on/off the security mode. It will be available at the beginning of 2017. Ajax Systems is working on its creating now.
Hub OS 2.Х
At the moment, Ajax Systems specialists are actively working on the new firmware version for Ajax Hub. It will be compatible with the existing firmware version for Ajax Hub and with the new Ajax Hub Plus. The new firmware will have a modeled structure for more flexible process of adding new functionality. The changes which are expected in the next update, are listed below:
- Possibility of adding up to 100 users;
- Possibility of adding up to 10 rooms;
- Increasing the operating time from the battery due to the use of microcircuit sleeping mode;
- Improvement of the radio test mode;
- PPPoE support;
- Time synchronization via Internet (NTP support);
- Wi-Fi support for Ajax Hub Plus;
- Direct work with security control panels (now it can be made only through the Ajax Systems server);
- Work with any other servers by means of their protocols, not only with the Ajax Systems servers;
- API for developers;
- Local web interface for adjusting Ajax Hub settings;
- telnet protocol support.
Personally, I am interested in the following capabilities from the listed innovations and improvements, as mentioned above: increased time of autonomous work, NTP support, API existence, admin-interface for adjusting settings and telnet support. All these innovations open the most interesting opportunities for automation of some domestic processes. For example, collection of statistics about the temperature in rooms and similar objectives, or switching on/off some kind of appliances, connected with the help of WallSwitch.
Partner portal for security companies
At this time, Ajax Hub connects control panels of security companies in a not very convenient way. All these manipulations with the administrator-user could scare away some clients (I was one of them). Soon the situation will change. At the beginning of 2017, Ajax Systems is planning to launch a partner portal, through which security systems can receive applications for connection, add and delete hubs of their clients. The administrator-user will stay under the control of the hub owner, and engineers of the company who provide security services will obtain the rights for adjusting and configuring Ajax Hub for one hour with the permission of user. This will make the process of connecting Ajax Hub to the control panel more convenient and clear for ultimate user and easier for security company.
Apple HomeKit and Amazon Echo support
Here you can read about what Apple HomeKit is. What Amazon Echo is you can read here. As far as I understood from the conversation with Ajax Systems engineers, Amazon Echo support already exists, but this module is not active in the current version of Ajax Hub firmware. Concerning the HomeKit support, here everything is only at the beginning. At present, Ajax Systems is working on estimation of the scope of work which is necessary to conduct for possibility of using integration with this framework from Apple Company for users. Ajax Systems find it difficult to notify the exact date of implementation of the Apple HomeKit and Amazon Echo support. It is only known that the preliminary implementation terms will be known at the end of the current year.
Value of the matter
When I was writing this review, the price of Ajax StarterKit was 249$. The price for detectors and additional SpaceControl key fob, with which my installation kit was completed:
- CombiProtect — 70$;
- FireProtect — 60$;
- LeaksProtect — 40$;
- SpaceControl — 25$.
By means of easy calculations one can see how much the set, similar to those in my review, can cost:
- Ajax StarterKit (1 p) — 249$;
- CombiProtect (3 p) — 210$;
- FireProtect (1 p) — 60$;
- LeaksProtect (2 p) — 80$;
- SpaceControl (1 p) — 25$.
Total: 624$. There is a limited warranty for all these devices during 2 years.
The bottom line
Ajax StarterKit doesn’t have analogs on the Ukrainian market. Moreover, Ajax Systems production is not only security systems, but it contains elements of smart home. The quality of Ajax Hub production and detectors is at the highest level. The functionality, which concerns security functions, works without a hitch. However, it would be unfair not to mention that the company is working in startup mode, because if you want to earn money, you need to have product which can be sold as soon as possible. It is clearly noticeable by the quality of program part. Some “prettiness”, which is primarily related to work of the hub with the Ajax Systems infrastructure, doesn’t always work smoothly. However, the process of software improvement is visible even for the naked eye and its quality grows with each update of the applications and hub firmware. If you need security system with human face, you can buy Ajax StarterKit without any hesitation.
My personal impression
I think, it is the first Ukrainian hardware startup which solves quite concrete, urgent problem and does it well, with an unprecedented level of convenience and simplicity. I am happy with my choice. Besides, I am happy with it enough to buy WallSwitch in the near future in the quantity that will be enough to control each critically important socket at my apartment. Moreover, I am planning to buy these beacons and to look how much it will increase my work experience with Ajax system, because I would like to automatically switch on the security mode of my apartment by leaving the reach zone of Beacon sensors. But it is too geek-like, so I will probably write about it in my new blog. If my friends or family ask me to recommend a reliable and convenient security system for their apartment or home, I will recommend Ajax StarterKit. It is very pleasant to use the thing every day, which was designed, developed and manufactured in Ukraine.
Gratitude
I would like to thank all the Ajax Systems employees for this excellent product. I would like to say thanks to Valentine Hrytsenko and Roman Konchakovskiy individually for the time they gave me and for assistance of all kinds in writing this material. In addition, I would like to thank Yuriy Novostavskiy. Yura, without sharing experience with you and without your experiments with Ajax Hub, this review would not be full enough.
Author — experienced mac user.
AJAX Wireless Security Kit
Hub kit. Kit consists of: 1 central unit Hub, 1 detector MotionProtect, 1 magnetic contact for doors and windows doorprotect, 1 remote control spacecontrol
Check price
